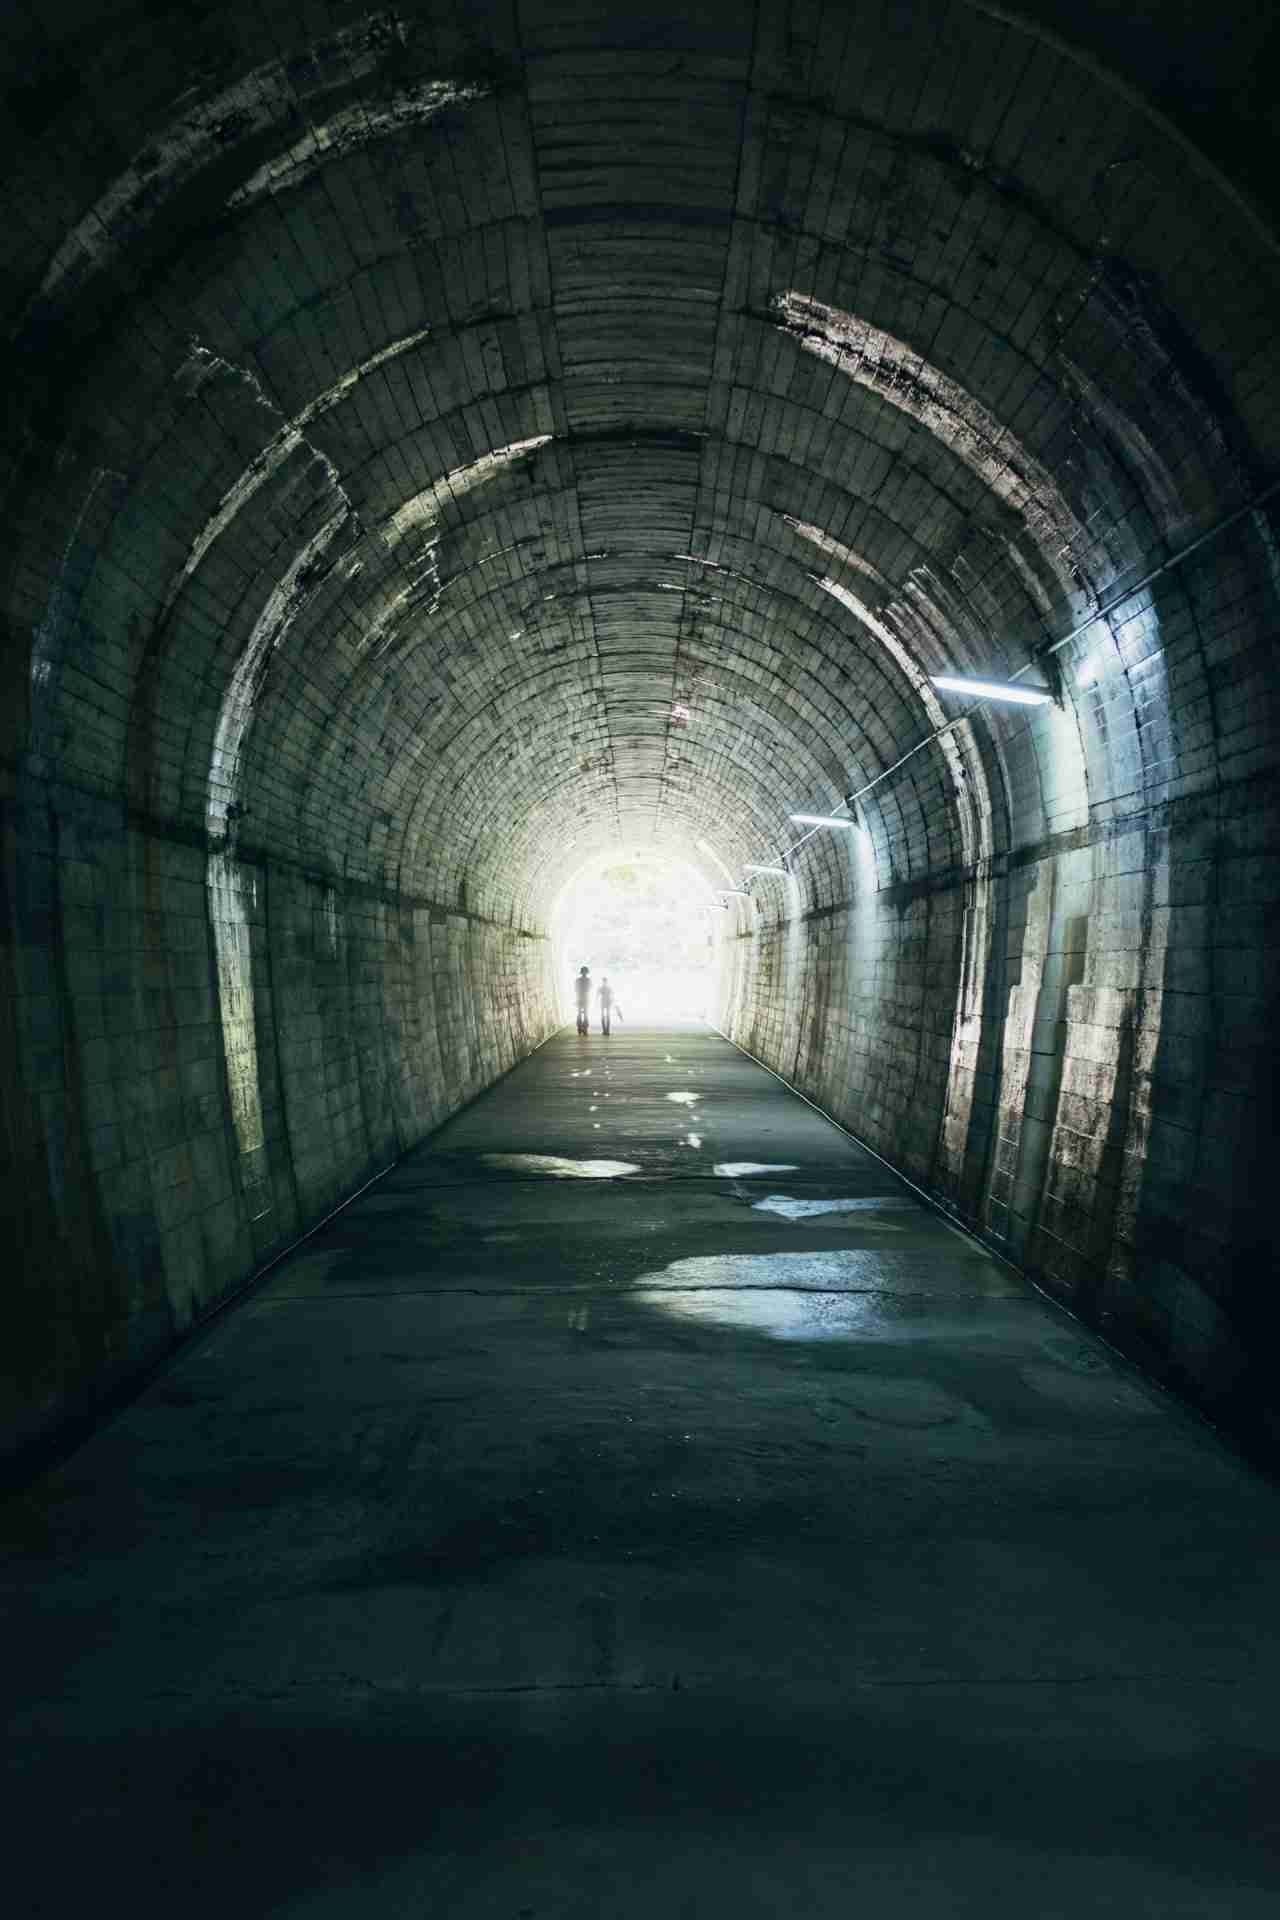

The tunnel at Cape Sata feels like part of the experience rather than just a way through. Cut through the hillside, this pedestrian passage leads you toward the southernmost point of mainland Japan, and there is a clear shift in atmosphere as you move from enclosed rock to open coastal views. It is not a long tunnel, but it gives you a strong sense of transition, which works well for photography if you take advantage of it. The contrast between the dim interior and the bright outside light outside creates a natural setup for framing and exposure play. Once you step through, the path continues toward viewpoints, a lighthouse, shrine and observatory, so it is easy to build a full shoot day around the area. It is a simple location on paper, but there is more to work with than you might expect.
Best Photography Opportunities
• Tunnel Exit Framing Toward the Coast
One of the strongest compositions here is shooting from inside the tunnel looking outward. The tunnel naturally frames the bright opening, which draws the eye straight toward the coastline beyond. By adjusting your position within the tunnel, you can control how much of the walls you include and how tight the frame feels. Exposing for the outside light will turn the interior into a darker frame, which helps simplify the image. If you wait for someone to walk through, you can add a sense of scale and movement without cluttering the shot. It is a simple setup, but it consistently produces strong results.
• Silhouettes Within the Tunnel
The difference in light between the interior and exterior makes this a great place to work with silhouettes. Positioning a subject near the exit allows you to capture clean outlines against the brighter background. This works well whether you are photographing people or just focusing on the shape of the tunnel itself. Timing matters here, especially if you want a clear separation between the subject and the edges of the frame. You can also experiment with different exposures to balance detail in the highlights while keeping the interior dark. It is an easy technique to try and gives you a different take on the same scene.
• Leading Lines Through the Passage
The tunnel itself provides strong lines that guide the viewer through the frame. Shooting from one end toward the other lets you emphasize depth and direction, especially if you keep the composition centered. The slight curve or variation in the tunnel walls adds just enough interest without distracting from the main subject. This works well even without a focal point, as the structure itself becomes the subject. You can also include a person walking through to give a sense of scale and movement. It is a reliable approach that works in most lighting conditions.
• Transition Shots Between Light and Shadow
As you move through the tunnel, there are moments where light starts to spill in and interact with the darker interior. These transition zones are great for more subtle compositions where you are not relying on a single strong subject. You can focus on how the light falls across the walls or how the brightness gradually increases toward the exit. This is a good place to slow down and look for smaller details rather than shooting the obvious wide view. It is especially effective if the light outside is soft rather than harsh.
• Coastal Views Just Beyond the Tunnel
Once you step out of the tunnel, the path opens up to views of the coastline and surrounding cliffs. It is worth turning back toward the entrance and using it as a framing element within a wider landscape shot. This gives you a sense of place and shows how the tunnel fits into the terrain. You can also move further along the path and shoot back toward the tunnel from a distance. The combination of rugged coastline and simple structure makes for a clean, balanced composition. It is a good way to connect the tunnel with the larger environment.
Best Time to Visit
Early morning and late afternoon are the most rewarding times to shoot here. When the sun is lower, the light entering the tunnel is softer and easier to work with, which helps balance exposure between the interior and exterior. Morning light can feel especially calm, with fewer people around and cleaner compositions. Late afternoon and sunset bring warmer tones to the coastal views, which adds another layer to your images once you move beyond the tunnel.
Midday can still work, but the contrast between bright exterior light and the darker tunnel becomes much stronger. This makes exposure trickier, though it can still be used creatively if you lean into silhouettes and high contrast scenes. Overcast conditions are actually very useful here, as they reduce the difference in brightness and make it easier to capture detail both inside and outside the tunnel. If you are planning to spend time along the coastal paths as well, it is worth timing your visit to catch changing light across the landscape.
How to Get There
Cape Sata is located at the southern tip of the Osumi Peninsula in Kagoshima Prefecture. The tunnel is part of the pedestrian route leading from the main parking and visitor area toward the lighthouse and observation points. Most visitors arrive by car, as public transportation options in this area are limited.
From the parking area, you follow a clearly marked path that leads you toward the tunnel. The walk is straightforward but includes some gentle elevation changes as you move through the terrain. There may be an access fee for the maintained area around the cape, as it is a managed site with facilities and viewpoints. The path is well maintained and suitable for carrying camera gear, though you will want comfortable footwear for the walk. Give yourself enough time to explore beyond the tunnel, as the viewpoints further along are just as worth photographing.
Recommended Photography Gear
A standard zoom lens is ideal here, as it lets you move easily between wider tunnel compositions and tighter details without changing lenses. A wide lens can be useful inside the tunnel if you want to exaggerate the sense of depth or include more of the walls in your frame. If you enjoy compressing scenes or isolating details along the coastline, a short telephoto can add variety to your shots.
A tripod is helpful if you want to carefully control exposure inside the tunnel, especially in lower light or when balancing interior and exterior brightness. It also gives you more flexibility if you plan to shoot at sunset or into lower light conditions along the coast. Since you will be walking between locations, keeping your setup reasonably light makes the experience more enjoyable. There is no need for anything too specialized here, but having flexibility in focal length will help you make the most of the different environments.
Nearby Photography Locations
Ogawa Falls is one of the strongest natural subjects in the area and gives you a completely different type of scene compared to Cape Sata. The waterfall drops into a clear pool surrounded by rock, which works well for longer exposures and more controlled compositions. The approach also lets you shoot from behind the falls, adding another angle that feels very different from typical waterfall shots.
This viewpoint gives you wide, elevated views across the surrounding landscape and out toward the sea. It is a great place to work on layered compositions, especially if visibility is good and you can see distant landmarks. The open space makes it easy to move around and refine your framing without feeling restricted.
Arahira Tenjin Shrine sits on a small rocky outcrop just off the shore, connected by a narrow walkway. It is a really clean subject that combines water, rock, and traditional architecture in a simple composition. The scene changes depending on tide and light, so it is worth spending time here rather than just grabbing a quick shot.
Also known as Kamafuta Shrine, this coastal shrine sits right at the edge of the sea and offers a unique shooting experience. The setting is very open, with waves, rock, and sky all playing into the composition. It works well for both wider shots and detail work, especially if you take time to explore different angles around the site.
Kaimondake is a distinct volcanic mountain that stands out clearly in the landscape and is often called the "Satsuma Fuji." It is a strong subject for cleaner, more minimal compositions, especially when viewed from a distance with open foreground. In clear conditions, it works well at sunrise or sunset when the light adds more depth to its shape.
Comments
Loading comments…