
Mount Pico de Loro, also known as Parrot's Beak, rises sharply from the tropical forests of Nasugbu, Batangas, forming one of the most visually striking peaks on the island of Luzon. Its steep summit, dramatic limestone monolith, and surrounding ridges offer an ever-changing mix of jungle texture, coastal haze, and distant sea views. For photographers, Pico de Loro delivers a dynamic blend of landscape, motion, and atmosphere. The trail that leads to its summit is just as rewarding, offering a sequence of rich photographic moments that evolve with every meter gained.
Named for the distinctive rock formation near its summit that resembles a parrot's beak, Mount Pico de Loro draws both hikers and photographers alike. It offers access to rainforest scenes, ridgeline vistas, sunrise and sunset light, and a panoramic summit view that opens out to both land and sea. Whether you are shooting during the steady climb through dense forest or from the breezy edges of the summit plateau, every section of the trail presents a fresh way to capture the light, shape, and energy of this iconic mountain environment.
Best Photography Opportunities
• Jungle Canopy and Trail Light in the Lower Slopes
The early sections of the Pico de Loro trail pass through dense tropical forest where dappled light falls across roots, leaves, and stream crossings. This is where the interplay of shadow and filtered sunlight creates strong foreground interest. Bring a fast lens to work in the soft morning light and focus on capturing texture and atmosphere—moist earth, hanging vines, and fog drifting through the canopy after rain. Look for natural framing from trees and branches as the trail gently climbs through the jungle.
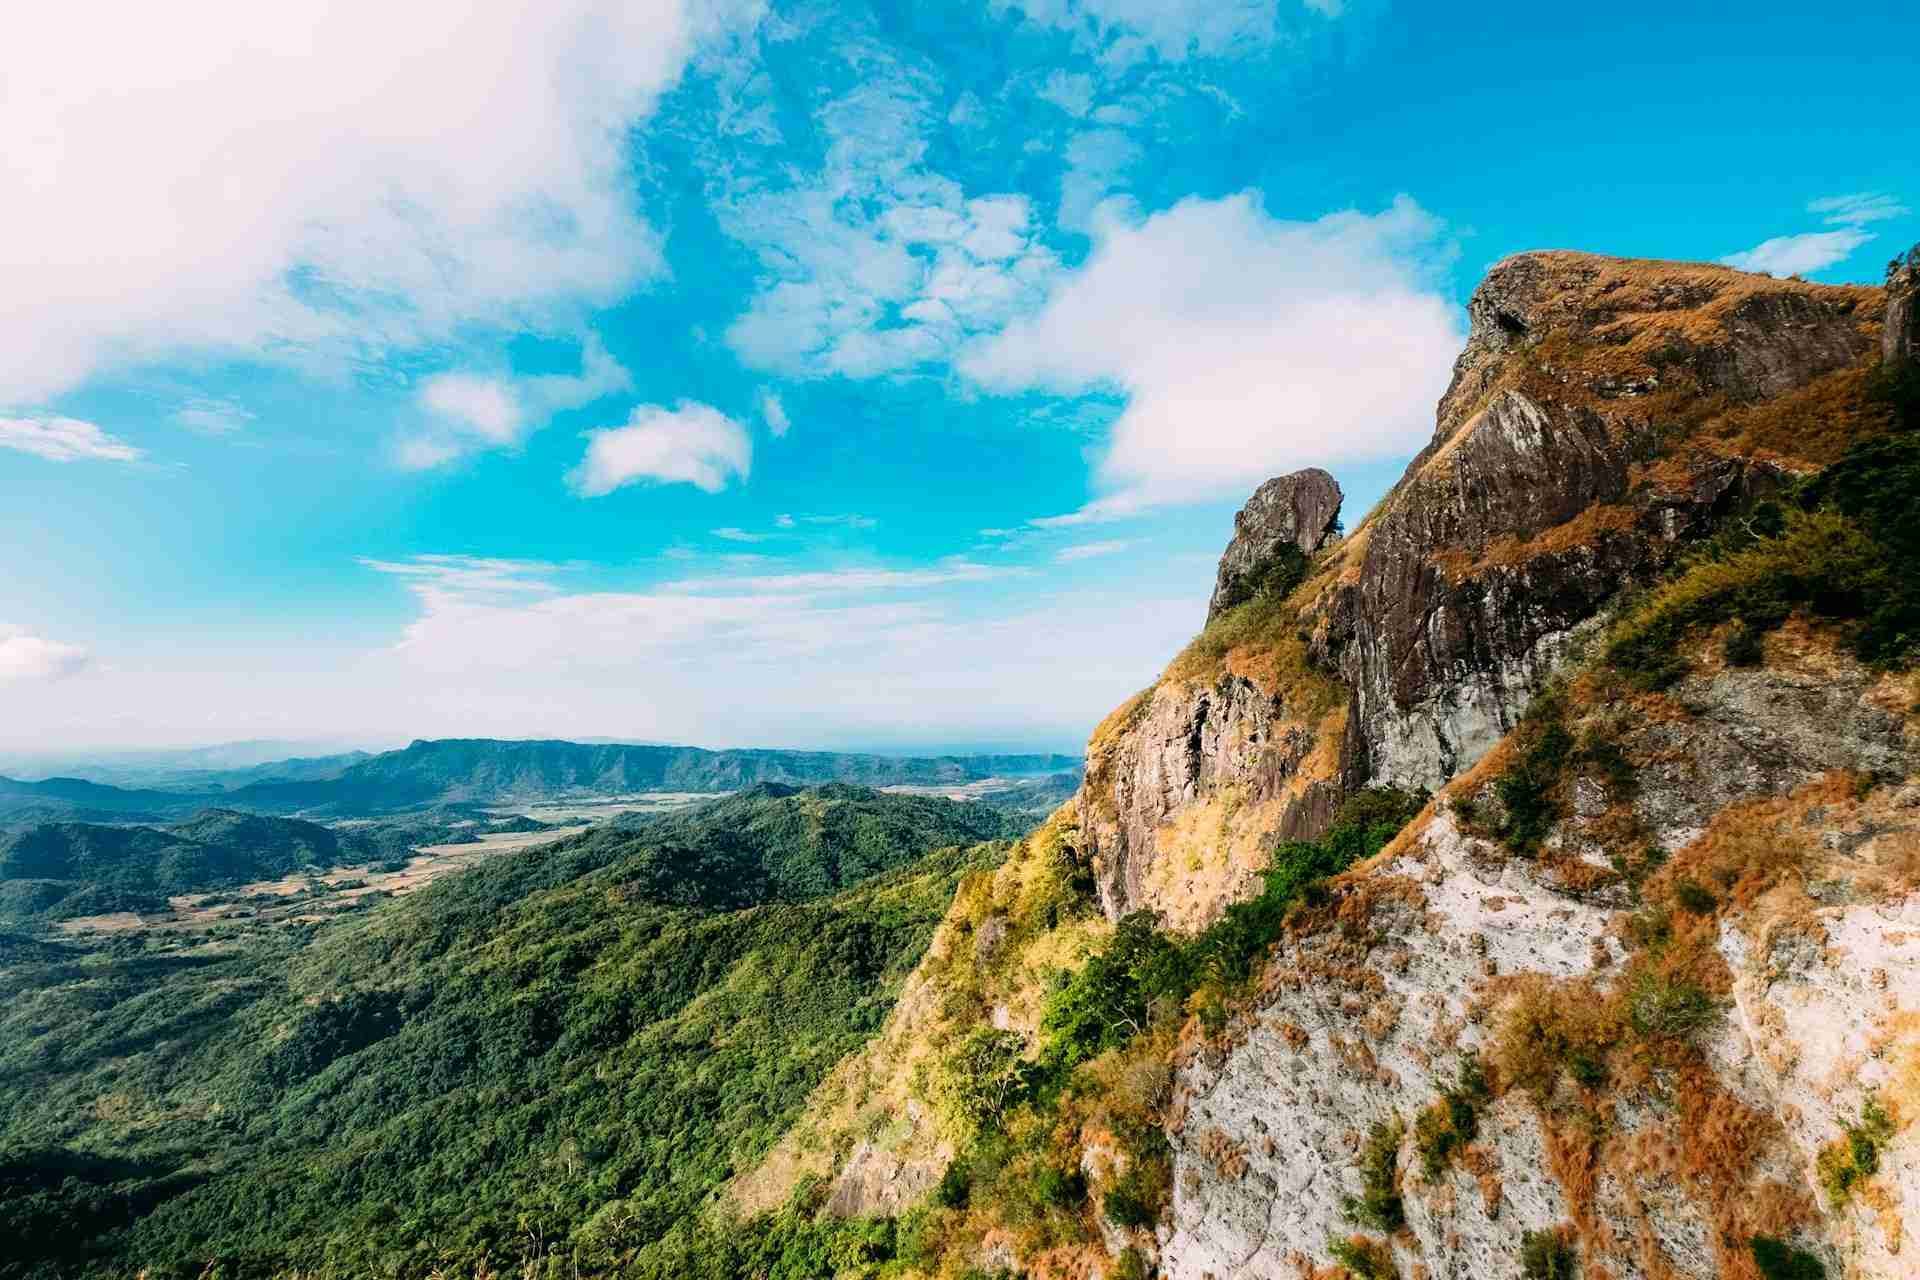
• Cliffside Views at the Summit Ridge
One of the most dramatic moments along the hike occurs as you reach the summit ridge. Here, the forest opens up to reveal views of the Batangas coastline and South China Sea. A wide-angle lens works well for these compositions, especially in the early morning when mist lifts from the valleys and sunlight begins to touch the ridge. In the golden hour, the light traces the curves of the land, casting long shadows and revealing the sharpness of the terrain. You can shoot along the trail itself, placing hikers or natural elements in the foreground to lead the viewer through the frame.
• The Monolith: Parrot's Beak Rock Formation
The massive limestone monolith just below the summit is the most recognizable feature of Pico de Loro. From several vantage points, especially along the summit ridge, you can frame this towering structure against sky or valley. During sunrise or late afternoon, the light catches the face of the monolith, highlighting its rough surface and vertical drop. A mid-zoom lens allows you to compress the background and add dramatic scale. Be sure to walk around the area to explore different elevations and angles. Safety is important here—many shots require careful footing near steep drop-offs.
• Golden Hour from the Pico de Loro Summit
Once at the summit, you are treated to an open view in nearly every direction. Early morning brings the clearest skies and softest color, often with a layer of mist resting below the horizon. Sunset creates dramatic contrast as the sun dips behind distant mountains or ocean haze. From the summit, you can photograph 360-degree views with rolling hills, farmland, coastal outlines, and even the occasional glimpse of Manila Bay in the far distance. This is one of the best places to work with layered landscapes and changing light, especially when clouds move through at low altitudes.
• Silhouettes and Motion Along the Ridge Trail
As hikers ascend or descend along the exposed ridge near the summit, you have the chance to shoot silhouettes or action scenes with strong backlighting. Position yourself downhill from the ridge and shoot upward toward the sky, especially during sunset or under overcast light. This technique captures both the energy of movement and the isolation of the ridgeline. A fast shutter speed helps freeze motion, while a slower exposure can allow for blurred figures and dynamic light.
• Atmospheric Changes During Rain or Fog
Weather moves quickly on Pico de Loro. If you're hiking on a day with changing conditions, be prepared for moments when fog rolls across the trail or sudden rain darkens the forest. These conditions can create moody, powerful frames that contrast with the more common bright views. Use a tripod or high ISO settings to adjust to low light, and keep your gear ready in a weatherproof bag. Fog in the forest is especially good for shooting strong depth and isolating tree shapes against a soft background.
Best Time to Visit
The dry season, from December to early May, is the most reliable time to photograph Pico de Loro. Skies are clearer, trails are more stable, and visibility from the summit is at its best. Sunrise and early morning hours during this period offer calm wind, soft light, and wide views, making them ideal for both trail and summit photography. Weekdays are less crowded than weekends, giving you more time and space to compose shots without interruptions.
If you are aiming to shoot sunrise or blue hour from the summit, you'll need to plan an overnight hike or arrive well before dawn. Bring a headlamp and allow extra time for a slower ascent in the dark. Sunset is easier to time and offers warm light across the ridge, though be prepared for a descent in fading light.
The rainy season, from June through November, brings lush growth and more dramatic weather. While the trail becomes more difficult and sometimes slippery, this season also offers fog, rain-drenched textures, and a richer color palette in the forest. Mist over the landscape can create strong atmospheric layers, especially in the early hours after a night of rain.
How to Get There
Pico de Loro is located in the Maragondon Range near Nasugbu, Batangas. The most common access point is the DENR (Department of Environment and Natural Resources) station near Barangay Papaya in Ternate, Cavite. From Manila, the drive takes around two to three hours, depending on traffic. Most visitors travel by private car or van. Public transport is available but more limited and may involve transfers between buses, jeeps, and tricycles.
From the jump-off point, you must register before beginning your hike. The trail is well-marked and maintained, with checkpoints and rest areas along the way. Entrance fees apply and may include a guide depending on current regulations, which can change based on weather and safety advisories. There is no additional fee for bringing photography equipment, but drones may require special clearance.
The hike to the summit typically takes three to four hours for moderately fit hikers. If you plan to photograph along the way, allow more time for stops, gear setup, and scouting compositions. The final section to the summit and monolith is steep and exposed, so caution and good footwear are essential. There are no permanent shelters on the trail, so plan accordingly if you're aiming for early or late light.
Recommended Photography Gear
A wide-angle zoom lens, such as a 16–35mm, is ideal for capturing the scope of the summit and the ridge views. Pair it with a 24–70mm for flexibility on the trail, allowing you to shoot both landscapes and closer scenes of hikers or trail details. For isolating the monolith or compressing distant ridgelines, a 70–200mm lens adds creative variety, especially during changing weather conditions.
A lightweight tripod is helpful for early morning or sunset shots, and for shooting in low light under the forest canopy. A circular polarizer can deepen sky tones and reduce glare on leaves and rocks. If you plan to shoot long exposures in bright light, bring a neutral density filter. A microfiber cloth is a must for clearing fog or moisture from your lens in humid conditions.
Pack your gear in a comfortable, weather-resistant backpack. Use lens pouches or padding to protect against movement on the trail. Carry extra batteries and memory cards, as power and access are limited. Also bring a rain cover or dry bag to protect your equipment from sudden downpours.
Wear durable hiking shoes with strong grip, and dress in layers to handle changes in temperature between the forest floor and the summit ridge. A headlamp is essential if you plan to shoot in early or late hours, and trekking poles may help steady your steps on steep, loose terrain.
Nearby Photography Locations
, which surrounds Pico de Loro, offers other ridgelines, forest trails, and birdwatching opportunities. Exploring the lesser-used paths provides chances to photograph dense jungle and smaller peaks with minimal foot traffic.
, a short drive from the base of the Pico de Loro trail, is a quiet spot with a small waterfall surrounded by rock and foliage. Best visited in the wet season or after rain, it offers a refreshing contrast to the open summit views.
• Nasugbu Coastal Roads
, south of the mountain, give wide views of the South China Sea and the Batangas coastline. These seaside cliffs and roads are best visited at sunset or blue hour, when the ocean reflects soft light and sea spray drifts across the shore.
• Ternate View Deck
, located on the road toward the Pico jump-off, provides a panoramic view of the forests below. On clear mornings, the view extends as far as Manila Bay, making it a good warm-up stop for sunrise or early light.
, nearby in the same mountain range, is a gentler hike with a wide summit and distinct rock formations. It offers a quieter alternative for long-exposure landscape work, with similar coastal light and ridge-based compositions.
Photographing Mount Pico de Loro is not only about reaching the summit. It is about following the light as it moves through jungle, ridge, and sky. The trail invites you to work slowly, to respond to weather, and to find balance between grand views and quiet detail. Whether you shoot from the base, along the trail, or from the summit's edge, every step on Pico de Loro brings you closer to a landscape shaped by time, weather, and light.
Comments
Loading comments…