Bayfront Pavilion in Gardens by the Bay is defined by a bold, engineered shell that feels more like a piece of infrastructure than a garden shelter. The triangular lattice skin creates a repeating pattern that reads differently depending on distance, focal length, and the direction you shoot from. The canopy's curved underside produces strong leading lines and a sense of motion, while the large opening acts like a built in frame for trees, paths, and whatever activity is moving through the space. Light is a major part of the experience here because the lattice throws patterned shadows across the ground, and those patterns shift quickly as the sun moves. This is a location where photographers can work graphic structure, layered depth, and human scale in the same scene without needing to travel far.
Best Photography Opportunities
• Under Canopy Patterns
The triangular grid is the main subject and it rewards close attention to repetition and alignment. Shooting upward from inside the pavilion lets the pattern fill the frame, and small shifts in position change the way triangles stack and overlap. A longer focal length can compress the grid into dense texture, while a wider view emphasizes the sweep of the curve as it rises overhead. Watch for hotspots where sun hits the metal directly, since they can pull attention away from the pattern. If you wait and shoot a short sequence, you will often see the shadow pattern on the ground change enough to create distinct variations without moving much.
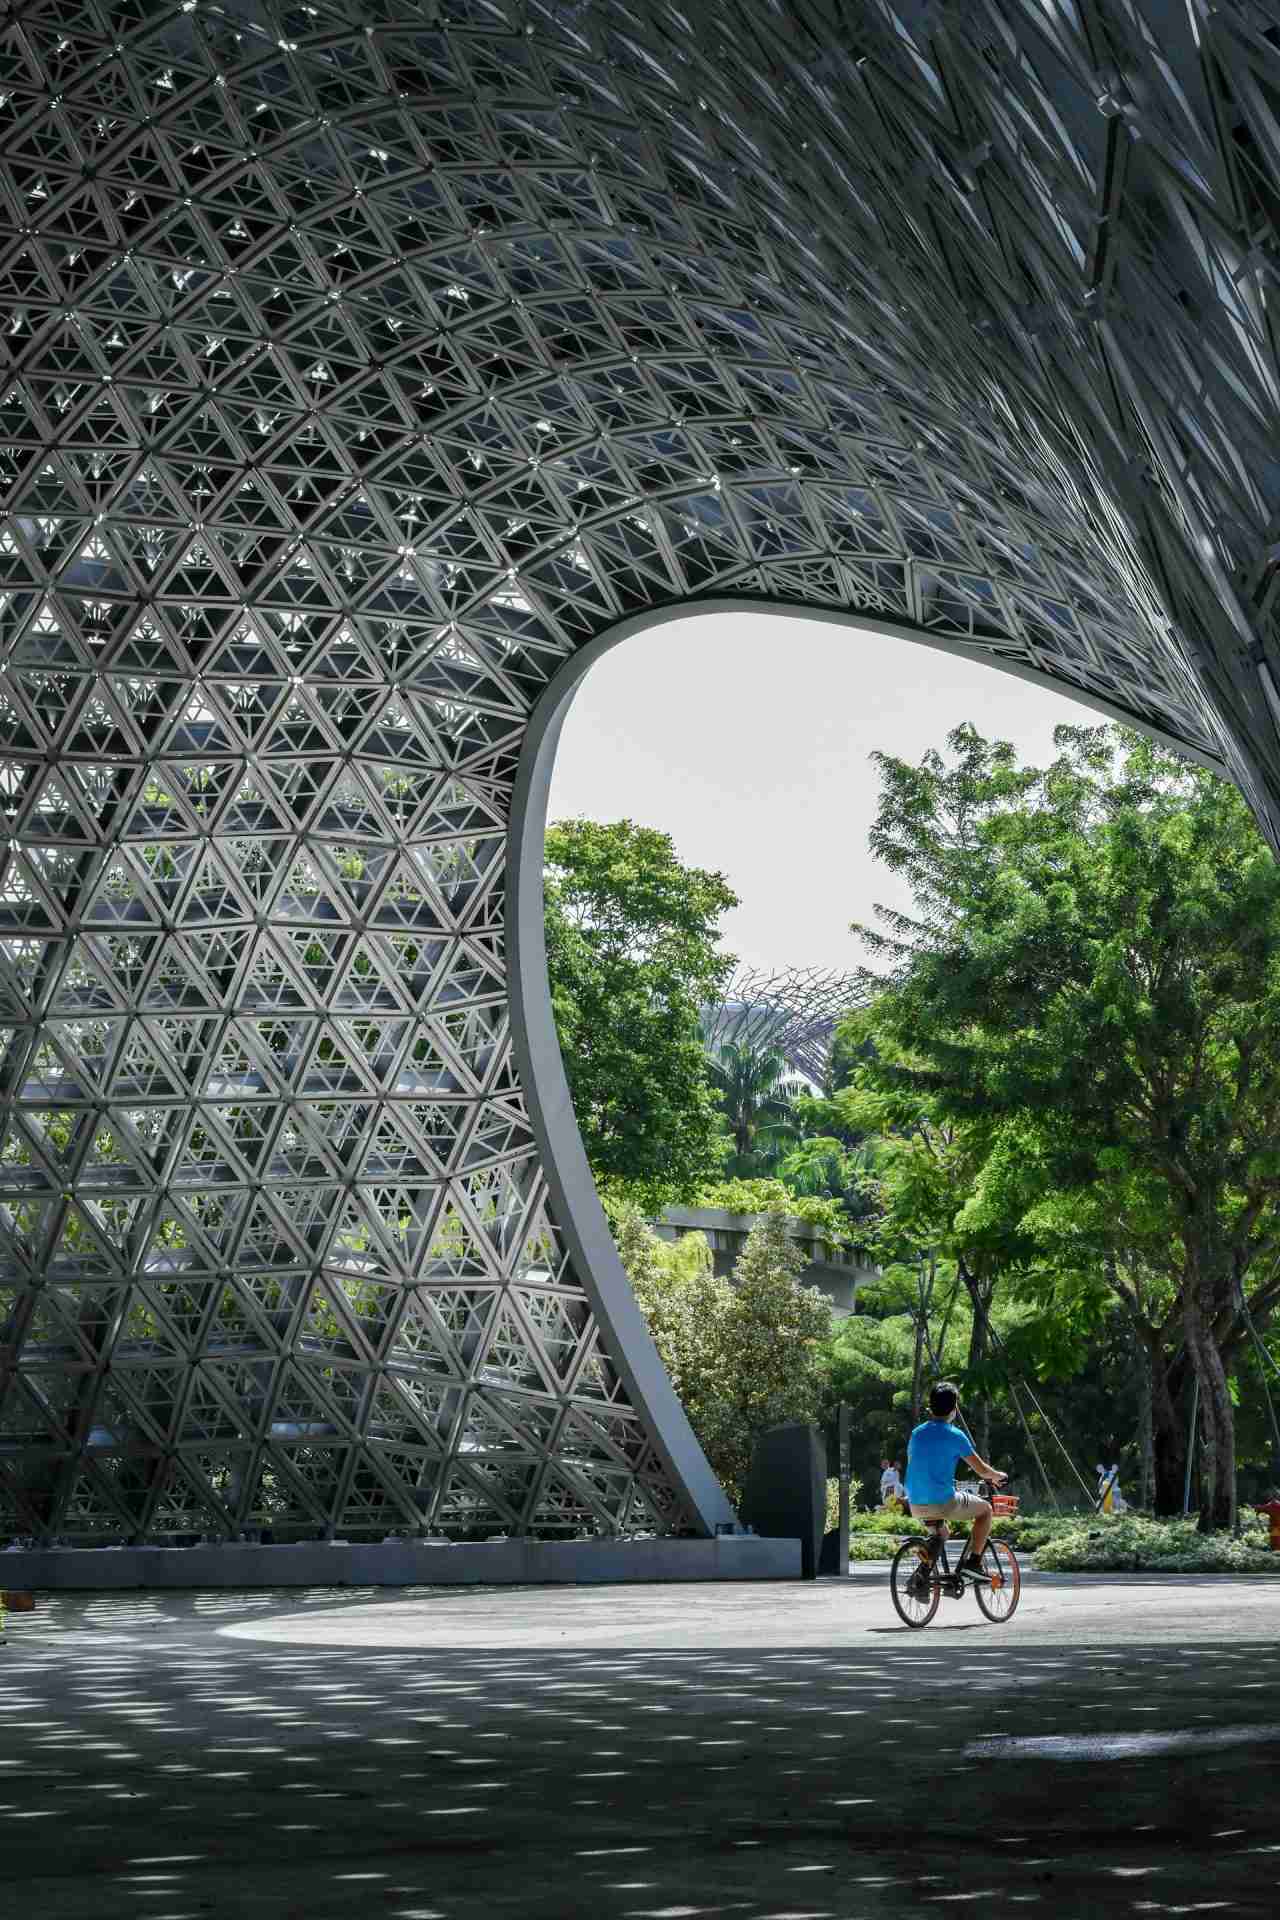
• The Framed Opening
The large openings are one of the strongest compositional tools at this pavilion because it gives you a built in frame with a clean edge. From inside, you can place the curved boundary around trees, pathways, and visitors to create a clear subject hierarchy. The openings work well for layered scenes, with the pavilion edge as foreground, garden activity in the mid-ground, and distant structures peeking through gaps in the greenery. If the background feels busy, step laterally until the frame contains simpler shapes, then wait for a single subject to enter the open space. This is also a good place to experiment with different camera heights, since a lower angle strengthens the canopy and a higher angle gives more room to the garden beyond.
• Curves and Converging Lines
From the exterior edges, the pavilion's shell reads as a sweeping curve that can dominate the composition. This viewpoint is useful for showing how the structure rises from the ground and folds overhead, especially when you include a small amount of surrounding landscape for scale. Look for positions where the curve guides the eye into the frame and where the triangular pattern remains readable rather than turning into visual noise. Side light can help define the geometry, but you will want to manage contrast so the underside does not collapse into a dark mass. Work slowly here, because a step or two can change how the curve intersects with trees and sky.
• Shadow Graphics on the Ground
When the sun is high enough, the lattice creates a shifting field of shadow shapes that can become the primary subject. These patterns are strongest on clean pavement, and they work well with minimal compositions that focus on rhythm and spacing. Add a human subject for scale, then time their position so they sit in a clean pocket of shadow rather than being cut by distracting lines. A faster shutter speed freezes the pattern and walking movement, while a slightly slower shutter can soften the person while keeping the shadow geometry sharp enough to read. This is one of the most reliable ways to make a fresh image at the same spot, since the pattern changes throughout the day.
• Human Scale and Motion Through the Structure
The pavilion works extremely well with people because the canopy provides a strong static form and visitors provide the narrative. You can shoot wide to show how small a person feels under the structure, or tighter to capture a figure passing through the framed opening. Timing matters more than direction here, since a crowded scene can flatten the image and make the structure feel chaotic. If the area is busy, wait for a single subject in a clear patch of light, then shoot a short burst as they move through the frame. Bikes, walkers, and families all add different pacing, and you can choose your shutter speed to either freeze them cleanly or show a hint of motion.
Best Time to Visit
Early morning is the most dependable time to work this pavilion if you want clean compositions and the ability to wait for the right subject without constant interruptions. The light is softer, the metal lattice is less prone to harsh glare, and the contrast between canopy shade and the surrounding garden is easier to manage. As the sun rises, the shadow pattern becomes more pronounced on the ground, and that can be excellent for graphic work, but it also increases contrast, so exposure discipline becomes more important. Midday can still be productive if your goal is shadow pattern photography, since the lattice throws strong shapes, but it is also the time when crowds are most likely to interrupt clean lines. Late afternoon can bring warmer light and calmer contrast, and it often produces a better balance between the pavilion interior and the brighter garden outside the opening. After rain, the ground can hold darker tones and subtle reflections, which can add depth to shadow pattern images, but you will want to watch for distracting wet patches. Because Singapore's seasonal changes are subtle, your results here depend more on time of day, cloud cover, and crowd levels than on month of the year.
How to Get There
Bayfront Pavilion is inside Gardens by the Bay and is easiest to reach from Bayfront MRT station, then follow the pedestrian routes into the gardens and continue toward the central attractions. The gardens have clear signage, and the paths are paved and level, which makes it straightforward to move with camera gear. Access to outdoor areas can be free in some zones, but certain sections of the gardens operate with controlled entry, so you should expect that some access may involve a fee depending on where you enter and what areas you plan to include. If you are photographing with a tripod, be mindful of pedestrian flow and any posted rules, especially in high traffic areas. Arriving early improves your options for clean compositions and makes it easier to work both the underside pattern and the framed opening without waiting through constant foot traffic.
Recommended Photography Gear
A lens range that covers both wide structure and tighter pattern detail is ideal here. A standard zoom is a strong starting point because it lets you shift quickly between the full canopy curve, the framed opening, and mid distance scenes with people without changing lenses in a busy public space. A short telephoto or longer lens is useful for compressing the triangular grid into dense texture, isolating repeating shapes, and simplifying backgrounds when the garden beyond the opening gets visually crowded. A polarizing filter can help reduce glare on bright surfaces and deepen tones in foliage, but you should rotate it carefully because uneven polarization can look strange in wide views of sky or reflective surfaces. A tripod is valuable in early morning shade and late afternoon, especially if you want consistent framing while you wait for a person to enter the scene, but in crowded periods it can be more trouble than it is worth. In those moments, image stabilization and solid low light performance often matter more than carrying extra support. Bring a cloth for humidity and occasional rain, and consider comfortable footwear, since the best images usually come from slow repositioning and repeated attempts at precise alignment.
Nearby Photography Locations
The Supertrees give you tall vertical structure and repeating geometry on a different scale than the pavilion. They are strong for graphic compositions and for including people to show proportion and movement.
The elevated walkway provides a higher perspective and cleaner separation between foreground and background. It is useful for layered views across the gardens, and it can complement pavilion work by adding a second structural subject to the same shoot.
This area offers calmer water, softer edges, and a more natural rhythm to balance the hard geometry of the pavilion. It is a good place to reset visually and build a more varied set of images from the same visit.
The barrage provides open space and big sightlines, which makes it easier to work skyline relationships and wide views. It also gives you a cleaner horizon and more breathing room than the tighter garden paths.
The Meadow is useful for wide, uncluttered frames and for shooting toward larger structures without constant foreground noise. It works well when you want negative space and simpler compositions to contrast with the pavilion's dense patterning.
Comments
Loading comments…