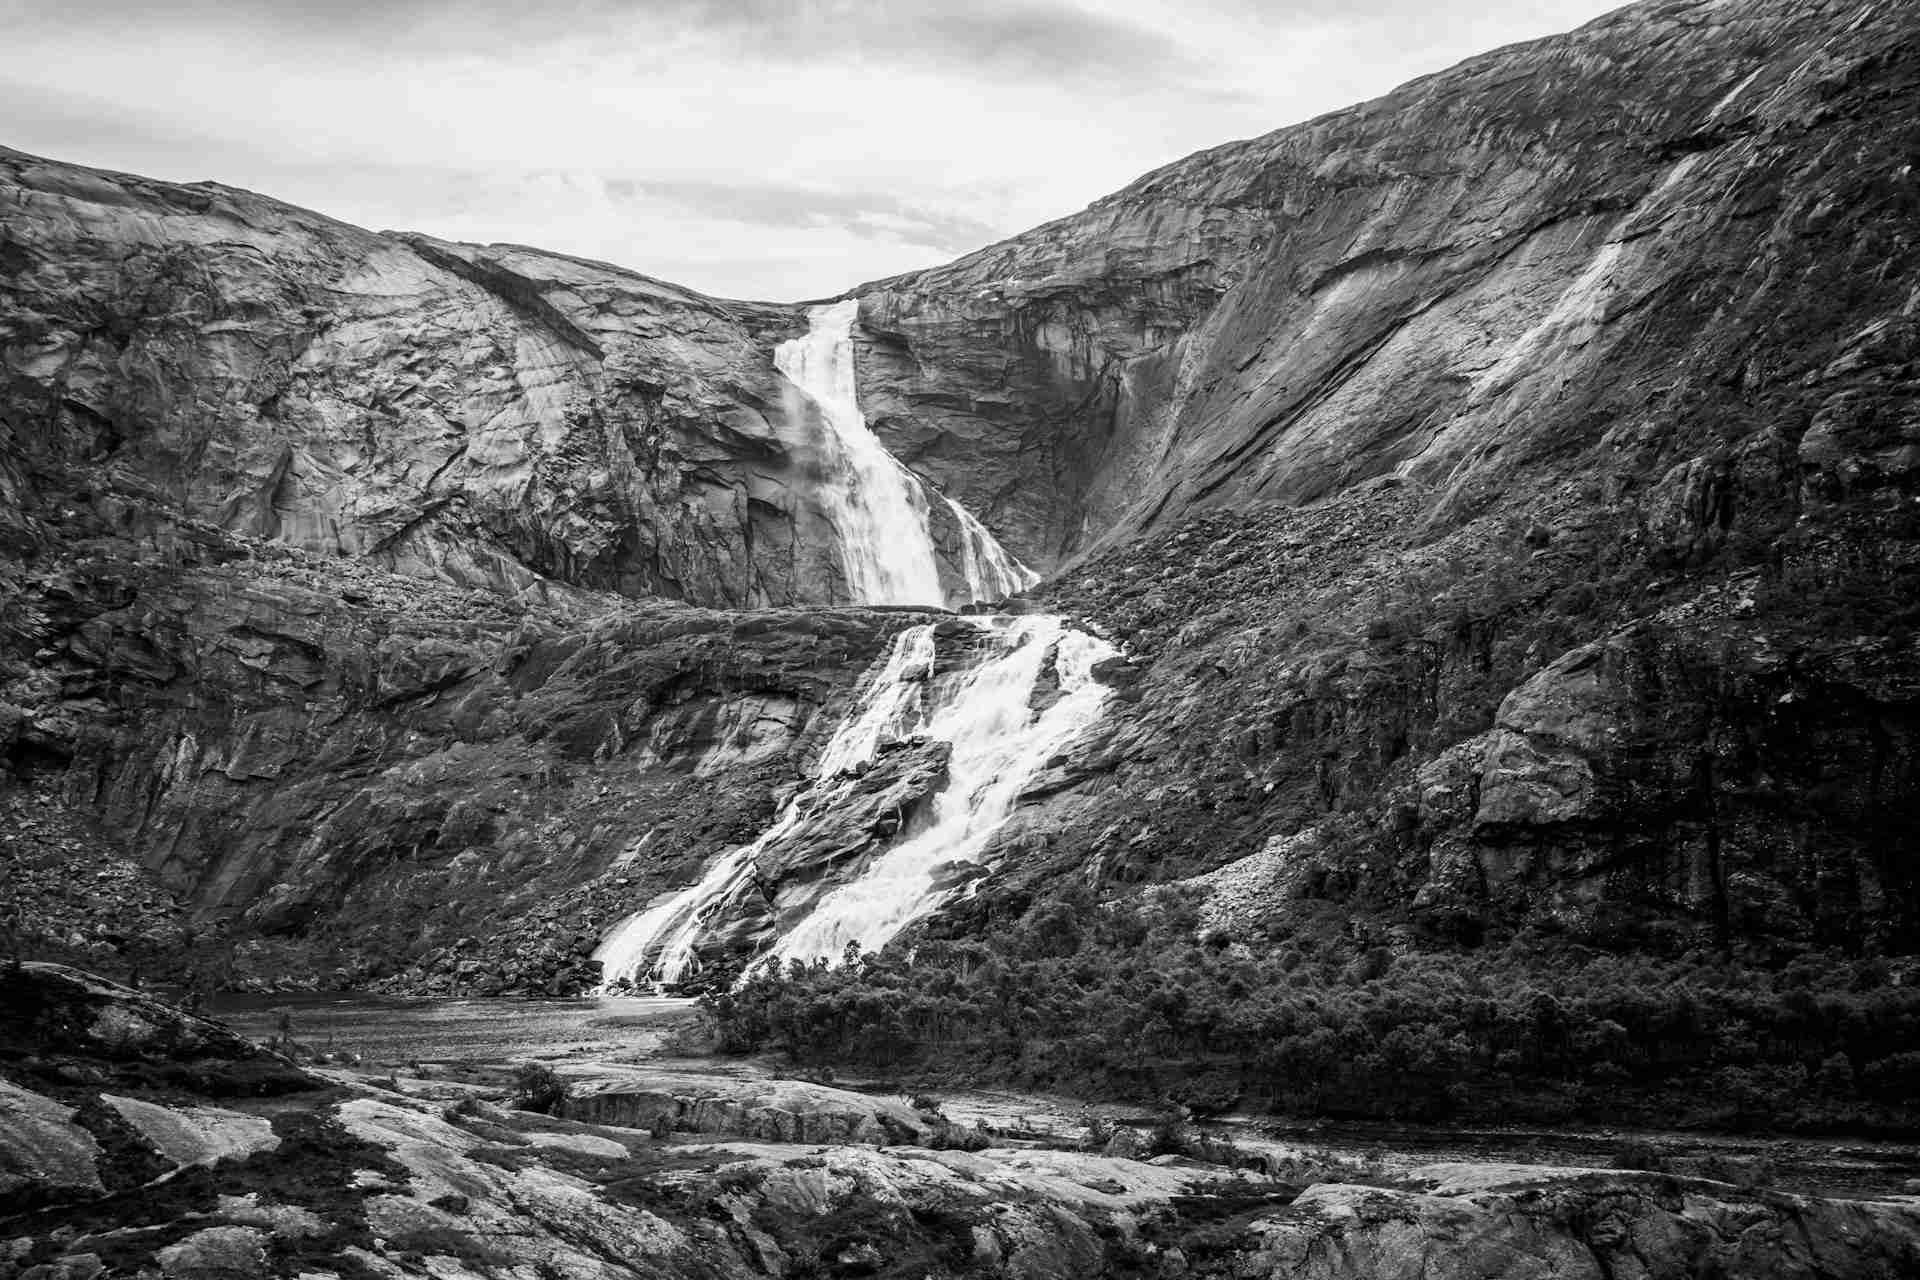

Nykkjesøyfossen sits high in Husedalen above Kinsarvik and is one of the more rewarding waterfalls in the valley to photograph. By the time you reach it, the landscape has opened up into a broad, rocky mountain setting where the waterfall drops in stages down a steep slope. The upper section has a strong, concentrated flow, while the lower cascades spread out across the rock and continue down toward the valley floor. That combination gives you more to work with than a single drop. It's a place where you can build layered compositions and take your time moving around to find angles that connect the different parts of the scene.
Best Photography Opportunities
• Head On Cascade Compositions
Setting up facing the waterfall from a lower position gives you a clear view of the full drop and a strong sense of scale. This is the most straightforward composition, but it works really well here because the shape of the falls is clean and easy to frame. With a longer exposure, the water smooths out nicely without losing its overall structure. The dark rock behind it helps keep contrast under control, so you're not constantly dealing with blown highlights. It's worth moving around a bit even within this angle, because small changes can affect how the layers of water line up. Expect some spray depending on the wind, so you'll probably be wiping your lens fairly often.
• Side Angle Depth Studies
Shifting off to one side changes the feel of the scene quite a bit. You start to see more depth in the waterfall, with different channels of water stepping through the rock. This gives you more to work with compositionally, especially if you bring in foreground elements like rocks or small plants. It also helps break up the scene so it doesn't feel too flat. You can experiment with different shutter speeds here and get a nice balance between texture and motion. Side angles can also help if the light is hitting the falls too directly, since you're not shooting straight into it.
• Detail Shots of Flow and Texture
There are plenty of smaller sections of water worth isolating if you like more abstract images. You'll find patterns where the water splits around rock or folds into itself on the way down. These areas work really well with a tighter frame and a mid range shutter speed where you keep some texture. It's a good way to come away with something different instead of just the standard wide shot. Pay attention to how the light hits these sections, because even slight changes can bring out more detail. This is also a good approach if the weather turns flat and you want to focus on shape instead of light.
• Foreground Framing with Rocks and Terrain
There are several spots where you can use rocks in the foreground to add depth and lead the viewer into the waterfall. This works especially well if you get low to the ground and let the foreground take up a bit more space in the frame. It helps balance the composition so the waterfall does not feel too centered or static. You can also use these elements to create a sense of scale, especially if the water volume is high. Be careful with footing, as rocks can be wet and uneven. Taking a bit of time to find a solid position makes a big difference in both safety and composition.
• Vertical Compositions for Emphasis on Height
Turning your camera vertically works really well here because of how the waterfall drops through the frame. It allows you to emphasize the full height of the cascade without including too much empty space on either side. This approach also works nicely if you want to include a bit of foreground at the bottom and still keep the top of the falls in view. It is a good option if the surrounding landscape is not adding much to the shot and you want to keep the focus on the water itself. Try a few variations with different focal lengths to see what feels balanced. Vertical shots here often end up being some of the strongest images from the location.
Best Time to Visit
Late spring into early summer is usually the sweet spot for Nykkjesøyfossen. Snowmelt feeds the river, so the waterfall has a strong and steady flow that looks powerful without turning into a blown out white mass. During this time, the surrounding landscape is also starting to come back to life, which adds a bit more interest without taking attention away from the falls. Summer can still be good, especially if you get overcast weather, but water levels can vary depending on rainfall. Autumn brings quieter conditions and fewer people, and if you time it right, you can get some nice color in the valley, though the waterfall itself will be less intense.
Lighting plays a big role here. Overcast days are easily the best conditions, as they soften the scene and make it much easier to control highlights in the water. Light rain can actually improve your results, adding a bit of atmosphere without making shooting difficult. If the sun is out, early morning or later in the day is your best bet, as direct midday light can create harsh contrast on the water and rock. The valley can shift between light and shadow quickly, so it helps to stay flexible and be ready to adjust your composition. Wind also affects how much spray reaches your lens, so calmer days make for a smoother shooting experience.
How to Get There
Nykkjesøyfossen is accessed from Kinsarvik, a small village along the Hardangerfjord that is easy to reach by car. From the village, you head into the Husedalen valley where the trail system begins. There is a road that leads partway into the valley, and depending on conditions and seasonal access, you may be able to drive further in before continuing on foot. Most photographers will still need to hike at least part of the route, as the waterfalls are spaced along the valley.
The trail to Nykkjesøyfossen is well established but not completely effortless. You will be walking on uneven terrain with some elevation gain, so proper footwear is important, especially if you are carrying a tripod and extra gear. The route passes multiple waterfalls, so it makes sense to plan enough time to stop and shoot along the way rather than rushing to a single location. Parking is available near the start of the valley, and there may be a fee depending on the season and how far you drive in. There are no technical sections, but conditions can change with weather, so always give yourself enough daylight to get back safely.
Recommended Photography Gear
A solid tripod is essential here, especially if you plan to shoot longer exposures to smooth out the water. The ground can be uneven and damp in places, so having something stable makes a big difference in both sharpness and ease of shooting. A standard zoom lens will cover most situations, letting you move between wider scenes and tighter compositions without constantly swapping lenses. If you enjoy isolating details, a short telephoto is worth bringing, as there are plenty of smaller sections of water that work well on their own.
Neutral density filters are very useful, particularly during brighter parts of the day when you still want to slow your shutter speed. A polarizer can help reduce glare on wet rock and bring out more contrast in the water, though you will want to adjust it carefully to avoid uneven effects. Because of the constant spray, you should bring multiple lens cloths and be ready to clean your front element often. Weather protection for your camera is a good idea even if rain is not in the forecast, as conditions near the falls can change quickly. Comfortable footwear and a practical way to carry your gear matter just as much as your camera setup, since you will be hiking and stopping frequently along the route.
Nearby Photography Locations
This is the first waterfall you encounter on the way into Husedalen, and it is one of the easiest to access. Its wider shape and multiple streams give it a very different look compared to Nykkjesøyfossen. You can get close enough to work on detailed compositions or step back and include more of the surrounding landscape. It is a great place to start the day and get into a rhythm before heading further up the valley.
Higher up in the valley, this waterfall is taller and feels more dramatic in scale. It works especially well for wider compositions where you want to show how the water interacts with the surrounding terrain. The height of the drop makes it stand out from the others, giving you a different kind of subject to work with. It is worth the extra effort to reach if you are already planning to hike through the area.
Søtefossen spreads across a broad rock face, with multiple streams flowing side by side. This makes it a strong location for layered compositions and more complex scenes. You will likely need to spend a bit more time here finding a clean frame, but there is a lot of potential once you do. It contrasts nicely with the more defined structure of Nykkjesøyfossen.
• Husedalen Valley Trail Views
Between the waterfalls, the trail itself offers several viewpoints looking back down the valley. These spots are great for wider landscape shots that show the scale of the terrain and the river cutting through it. Changing light can create interesting patterns across the slopes, especially if clouds are moving through. It is worth turning around occasionally instead of focusing only on the waterfalls ahead.
• Hardangerfjord Shoreline
Back near Kinsarvik, the fjord gives you a completely different type of scene to work with. Calm water, reflections, and distant mountains create a more relaxed shooting environment after time spent in the valley. It is a good option for sunrise or sunset, especially if the light is clear. Pairing a fjord shoot with the waterfalls makes for a well rounded day of photography.
Comments
Loading comments…