
Tucked beneath the CN Rail tracks just west of Niagara Falls, the Screaming Tunnel is a short, limestone culvert with a reputation far larger than its size. Carved in the early 1900s to channel water under the rail line, the tunnel has since become one of Ontario's most infamous haunted locations. Local legend tells of a young girl who perished in a fire within the tunnel, and her ghost is said to scream when a wooden match is lit inside. Whether or not the tales hold truth, the site's eerie quiet, weathered stonework, and tunnel geometry make it a compelling photographic subject—especially for those who appreciate atmospheric locations steeped in lore.
With its moss-covered limestone walls, curved archway, and naturally diffused light, the Screaming Tunnel offers unique compositional possibilities. Photographers looking to capture mood, symmetry, or contrast between shadow and stone will find the space surprisingly versatile. It's a location that lends itself well to everything from long exposures and conceptual portraits to minimal black-and-white studies.
Best Photography Opportunities
• Tunnel Symmetry and Vanishing Point
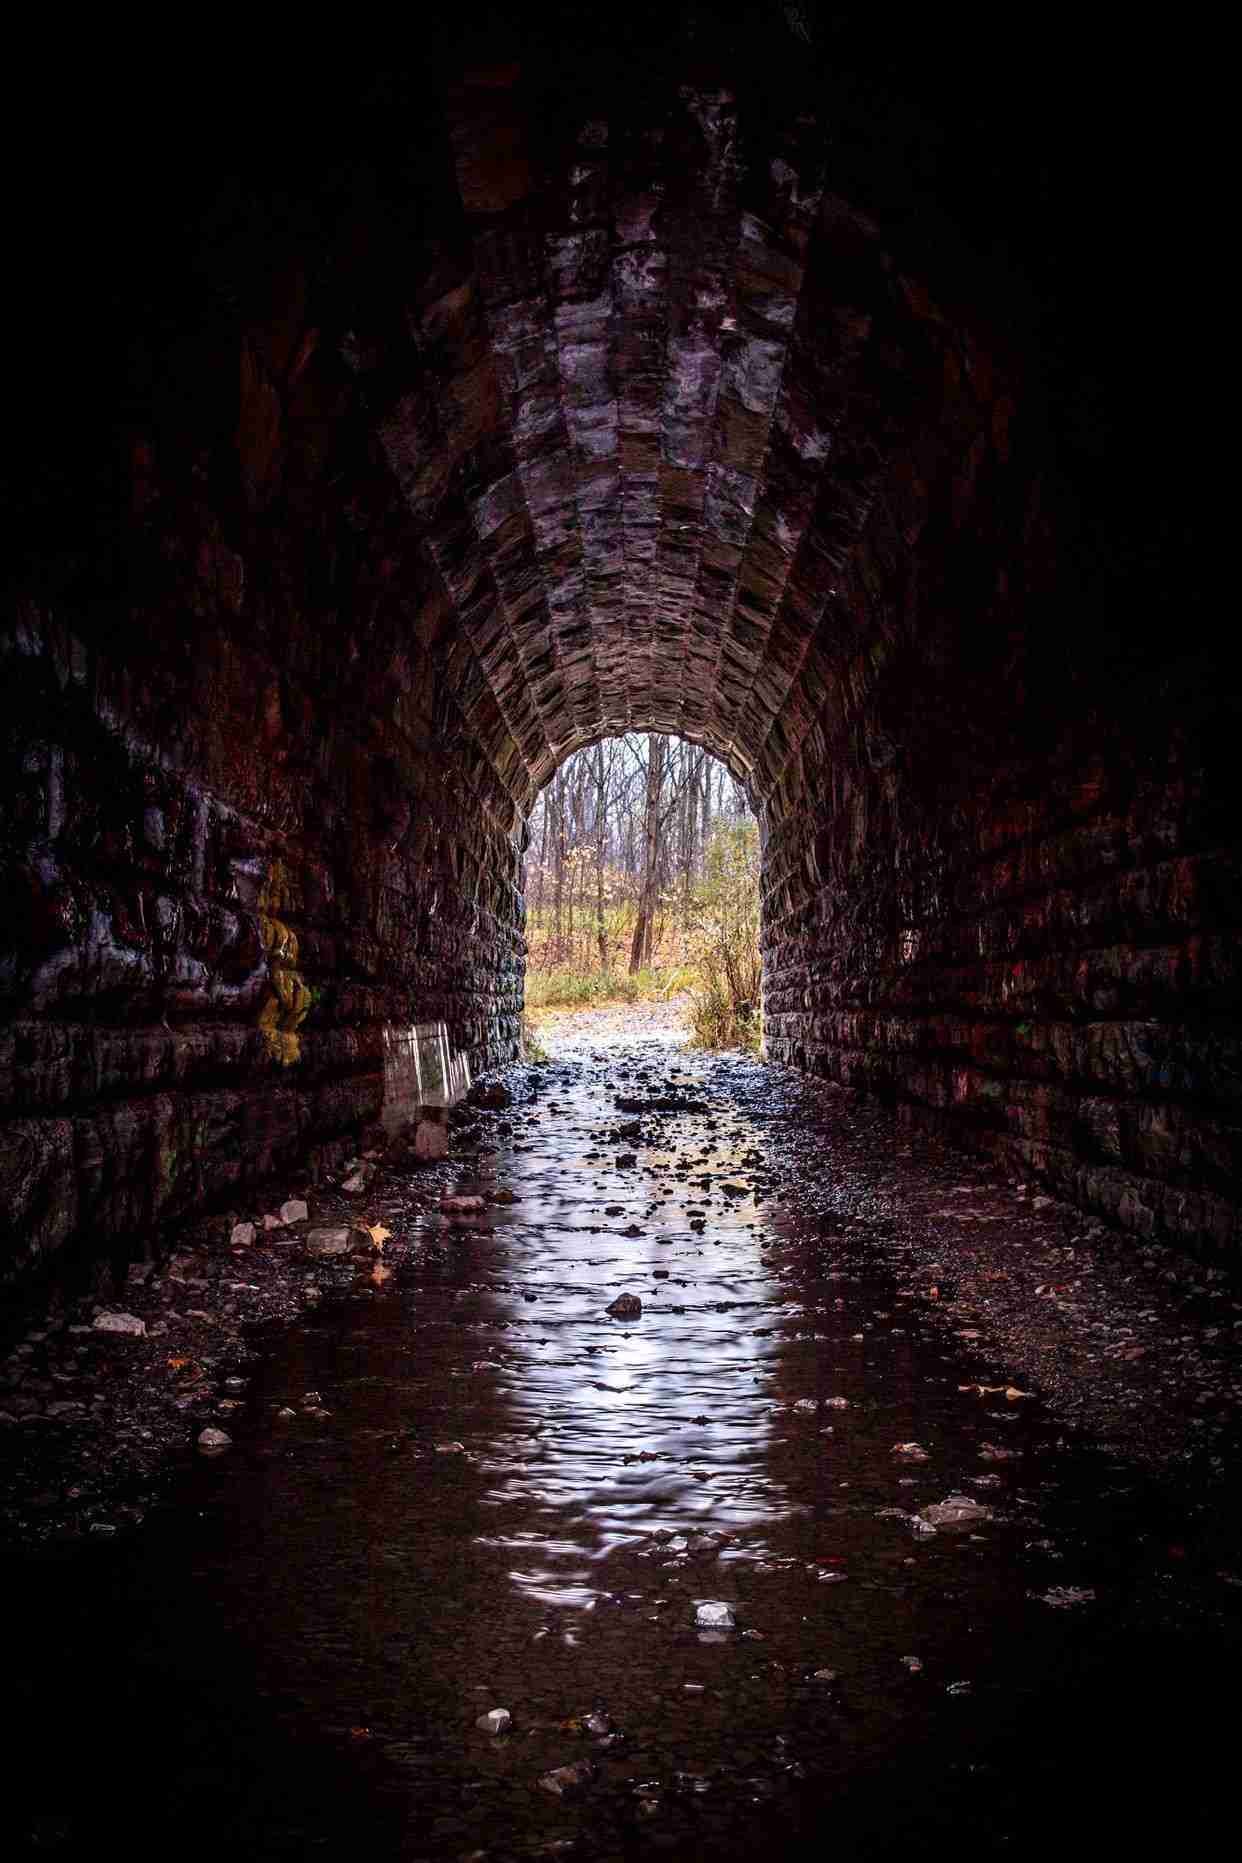
The classic head-on view into the tunnel offers clean lines and strong symmetry. Stand centered at the north or south entrance and shoot straight through the archway to create a perfect vanishing point effect. A wide-angle lens enhances the sense of depth, especially when including the curved limestone walls and forest framing the entrance. Use soft natural light or misty conditions to heighten the atmospheric mood.
• Interior Texture and Light Play
The rough-cut limestone inside the tunnel is weathered and uneven, stained by water and time. These surfaces reflect light in unpredictable ways, especially when sunlight streams through from one end. Midday or early afternoon is ideal for catching these narrow light beams, which highlight surface detail and create dynamic contrast. For more abstract compositions, use a tripod to isolate areas of texture or shoot long exposures with controlled light painting.
• Conceptual Portraits and Environmental Mood
The tunnel's lore lends itself well to narrative or horror-themed photography. Position your subject silhouetted against the far opening, or use side lighting to partially illuminate a figure for dramatic contrast. A wide aperture and low ISO keep the mood clean and focused. Bring a flashlight or headlamp for selective lighting if shooting in very low light or experimenting with more theatrical images.
• Framing Through the Archway
From outside the tunnel, frame the forest or footpath beyond using the tunnel entrance as a natural arch. This technique works well at either end and can produce a layered look, where the tunnel frames a scene full of light and color beyond. This juxtaposition between the darkness of the stone and the brightness of the landscape enhances the eerie mood of the location.
• Night Photography and Light Trails
While access after dark requires caution, the tunnel is a unique place for night photography. Use a tripod to shoot long exposures with handheld lights, colored gels, or subtle light trails to mimic the flicker of a match or suggest ghostly presence. Include stars or passing headlamps outside the tunnel for a layered shot that blends urban myth with photographic storytelling.
Best Time to Visit
Early morning and late afternoon offer the best natural light, especially when the sun is low enough to stream into the tunnel from one end. These times create long shadows and glowing arches that are ideal for capturing contrast and mood. Overcast days help soften the scene and bring out the limestone's subtle tones and texture without harsh highlights.
Autumn is particularly atmospheric, with fallen leaves scattered across the tunnel floor and golden trees visible at each entrance. Spring offers lush green framing, while winter adds stark contrast with snow and ice around the structure. Summer midday light can be harsh at the entrances but may cast interesting shafts of light through the tunnel's length.
The site is popular with visitors on weekends, so for solitude and uninterrupted shooting, aim for weekday mornings or off-season visits. Low foot traffic will also help if you're planning to use longer exposures or include props and portrait subjects.
How to Get There
The Screaming Tunnel is located just off Warner Road in Niagara Falls, Ontario, near the intersection with Queen Street. From downtown Niagara Falls, take Lundy's Lane west, then turn north onto Warner Road. There is a small gravel pull-off on the west side of the road near the railway overpass, and a short trail leads into the woods directly to the tunnel's north entrance.
There is no official signage, but the trail is well-worn and easy to follow. Parking is limited, and the area is not patrolled, so be sure to bring everything you need and respect the site. The tunnel is open to foot traffic and free to access. Be cautious near the railway lines and avoid visiting during or after heavy rain, as the tunnel floor can become slippery and muddy.
Recommended Gear and Shooting Tips
A wide-angle lens is essential for full-tunnel shots and interior compositions. A mid-range zoom offers flexibility when capturing texture and framing your subject within the archway. A tripod is highly recommended for any low-light or long-exposure work inside the tunnel. If you're shooting at night or experimenting with creative lighting, bring a flashlight or small LED panels to selectively highlight the interior or your subject.
A circular polarizer can help control glare on wet stone and deepen color in the surrounding forest. A remote shutter or interval timer is useful for light painting or working with yourself in-frame. Avoid flash photography—it tends to flatten the tunnel's textures and kills the moody ambiance.
Spend time scouting the tunnel from both ends. The light and reflections differ depending on season and time of day. Don't hesitate to revisit if conditions aren't right on your first try—fog, rain, or golden light can transform the space dramatically.
Nearby Photography Locations
A short drive away, this deep gorge along the Niagara River features dramatic cliffs, ancient rock formations, and woodland trails. Excellent for wide landscapes and nature abstracts.
• DeCew Falls and Morningstar Mill
Located in nearby St. Catharines, this waterfall and historic mill site offer strong heritage architecture alongside natural beauty. Ideal for pairing with the tunnel in a themed shoot.
• Queenston Heights and Brock's Monument
This elevated site features expansive views of the Niagara River and formal gardens around the monument. Great for sunrise or sunset skyline work and layered compositions.
• Niagara Falls Urban Textures and Architecture
Explore downtown Niagara Falls for contrasting imagery—gritty alleys, faded signage, and historic façades add urban texture to your shoot day.
Tucked into the Niagara Escarpment, this seasonal waterfall and surrounding woodland offer quiet, natural compositions with dramatic limestone terrain.
The Screaming Tunnel invites photographers to blend setting, story, and mood in equal measure. Whether you're chasing long exposure water streaks, experimenting with ghostly portraits, or just looking to explore a photogenic site steeped in folklore, this small tunnel carved through stone offers an unexpectedly rich and memorable experience.
Comments
Loading comments…