Biodome, Montreal: A Climate-Controlled World of Photographic Diversity Nestled within Montreal's Space for Life complex, the Biodome offers an immersive journey through five carefully recreated ecosystems—from tropical rainforests to subarctic islands—all housed under one architectural shell. For photographers, it's a rare opportunity to document diverse wildlife and environmental textures without traveling across continents. The Biodome isn't just about animals; it's a study in contrast, atmosphere, and adaptation, offering challenges in lighting and movement that reward both patience and technical control. Whether you're focused on macro details, expressive animal behavior, or the interplay between environment and enclosure, this space delivers a range of subjects few locations can match in such proximity.
Best Photography Opportunities
• Tropical Rainforest Habitat and Atmospheric Layering
Stepping into the Biodome's tropical rainforest is like walking into a lens-testing dream. The warm, moisture-rich air creates soft natural diffusion, while the dense foliage scatters the light across multiple layers of plant life. Golden lion tamarins dart through the canopy and sloths drape over branches in indirect, directional light. Use a fast telephoto lens (70–200mm f/2.8) and a high ISO to maintain 1/500s or faster shutter speeds for action. Compose with overlapping ferns or tree trunks to frame your subjects and give your shot depth. Patience pays off here—wait for birds to land in a shaft of light or animals to pause in a visual opening. Handheld shots at wide apertures (f/2.8–f/4) give excellent subject isolation, and intentional backlighting through mist adds a cinematic glow that evokes real rainforest drama.
• Laurentian Maple Forest and Seasonal Texture
This biome mimics the northern hardwood forests of Quebec, offering an entirely different tonal palette—rust reds, umber browns, and soft moss greens. Simulated lighting mimics the golden hue of fall afternoons, and animals like lynx and river otters often emerge in side-lit forest clearings. Use a 24–105mm lens for versatility when shooting through branches or underbrush. Compose with layered elements—foreground leaves out of focus, middle ground wildlife sharp, and soft backgrounds of bark and foliage. Shoot at f/5.6 to f/8 to maintain clarity across these layers. Look for animal tracks in the mulch that lead to naturally framed settings. Otters in particular offer compelling action when in motion—shoot bursts as they dive, and use curved logs or rocks to enhance the narrative of movement.
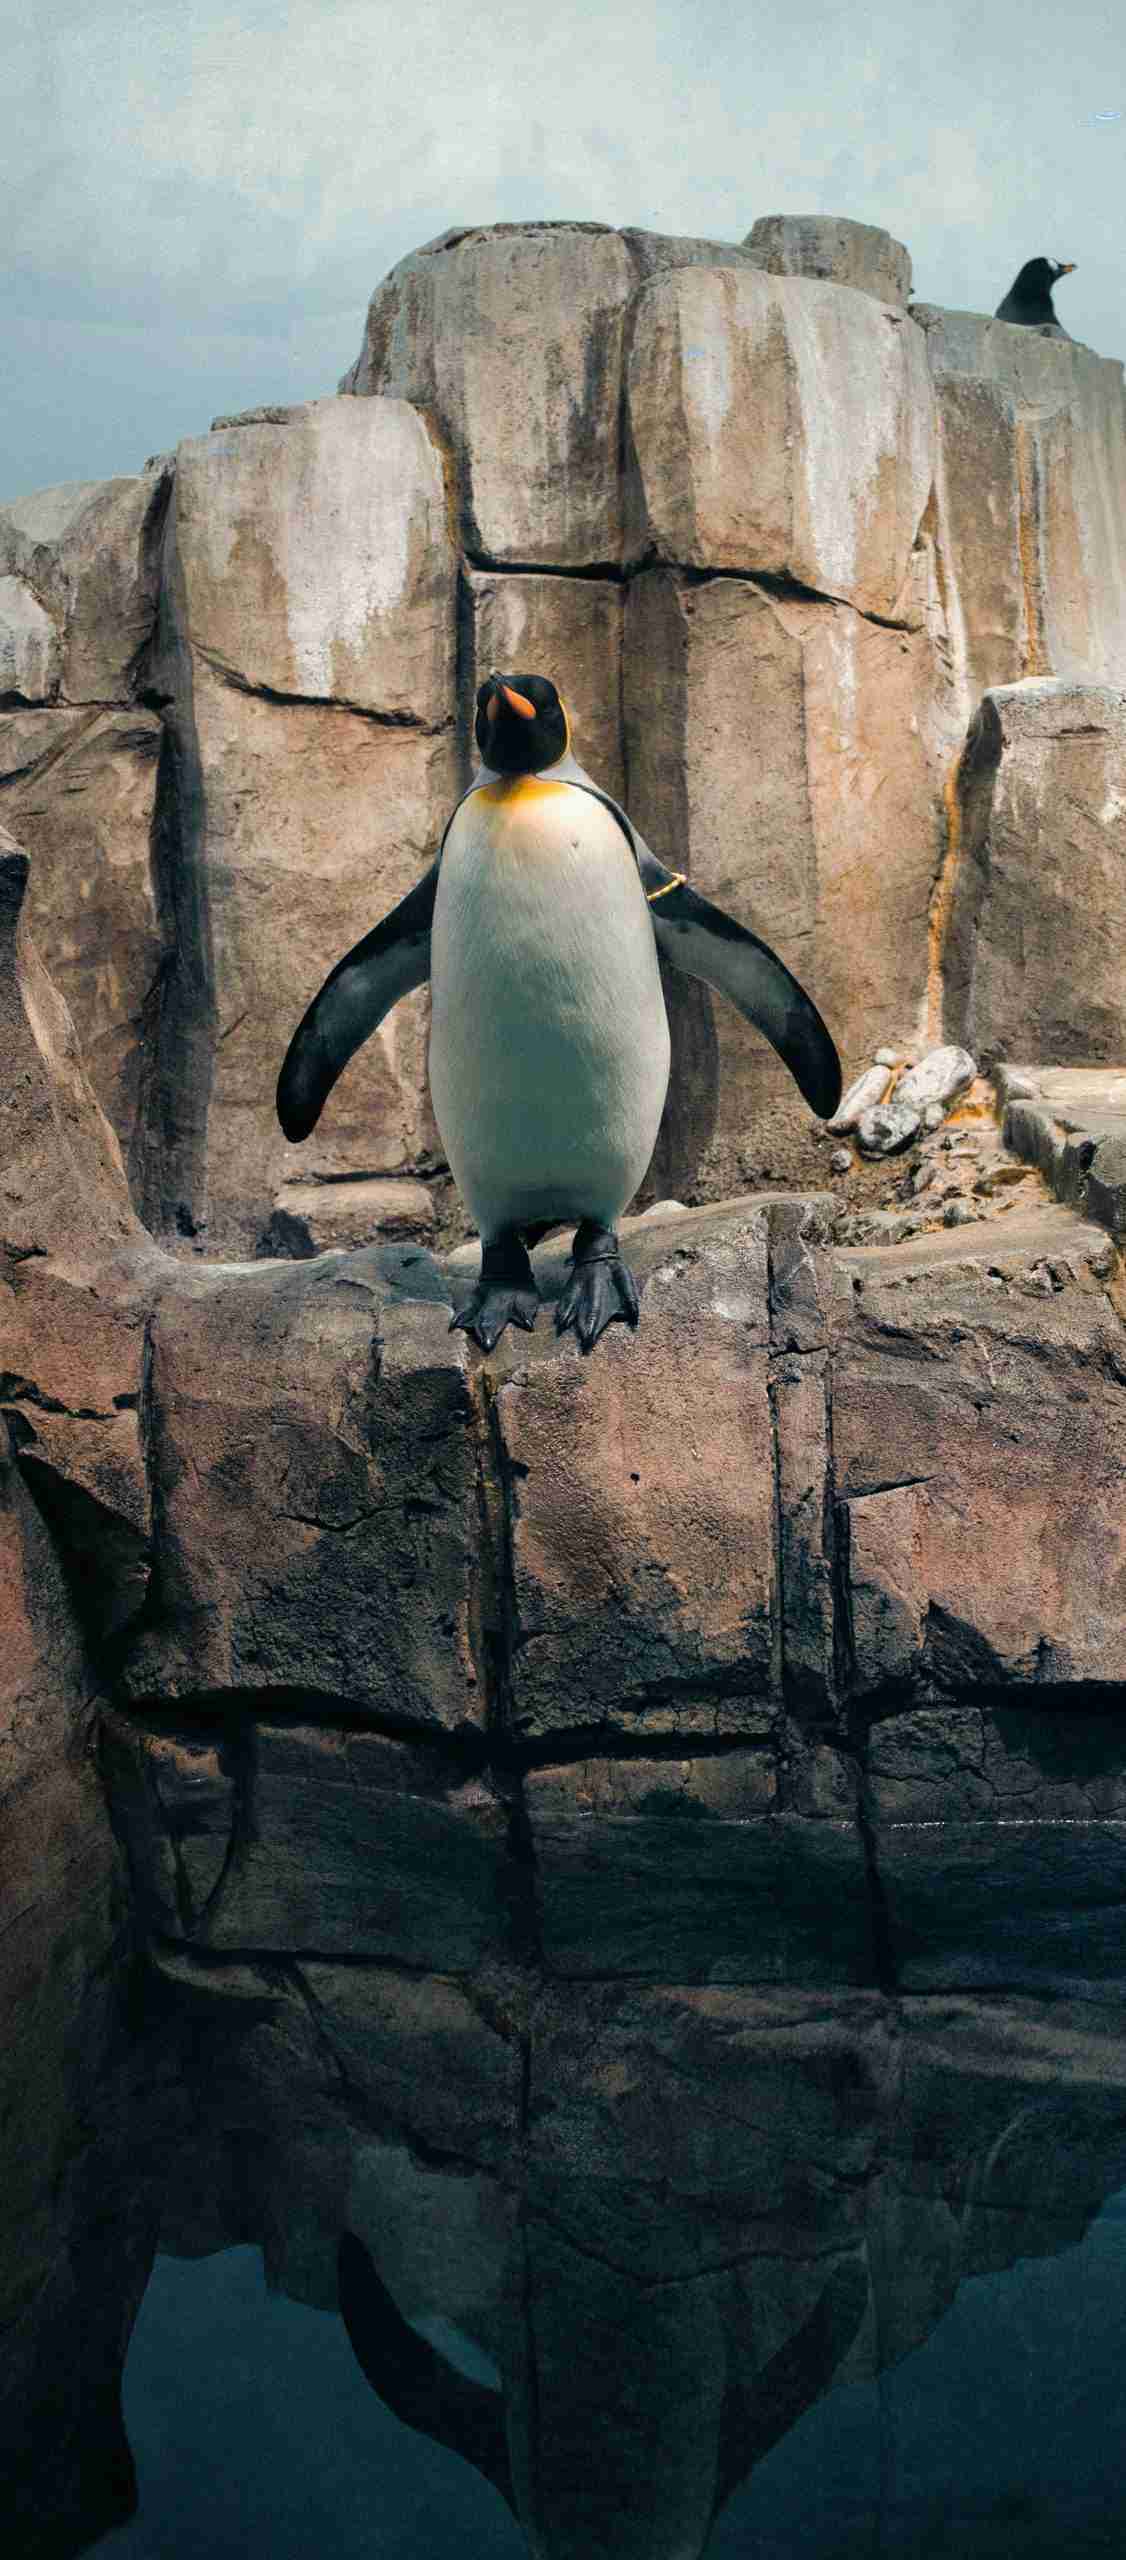
• Subpolar Regions and Expressive Wildlife Interaction
In the cold, coastal zones representing the Labrador coast, light bounces sharply off gray rock and icy water, creating high-contrast opportunities. Puffins often perch on ledges while harbor seals swim below. A 100–400mm lens allows you to capture detailed expressions, whether a puffin is calling or a seal's reflection is breaking through water. Look for synchronized behavior in seabird groups and use the rule of thirds to frame isolation against a clean background. Depth is flattened by even lighting here, so use compositional techniques like negative space or repeating shapes in rocks to create interest. A faster shutter (1/1000s or more) is key for diving birds. These are spaces where timing is everything—wait for the rhythm of movement and anticipate the peak of an interaction to press the shutter.
• Underwater Viewing Zones and Motion Blur Control
Shooting through thick aquarium-grade glass presents its own technical hurdles—low light, motion, and distortion. Use a fast lens (f/2.8) and keep ISO high (1600–3200) to maintain a usable shutter speed, especially when penguins rocket through the frame or beavers twist underwater. Shoot with your lens hood pressed to the glass, eliminating reflections. To capture a painterly effect, pan with subjects at 1/60s and shoot bursts to catch one sharp frame amidst blur. You can shoot head-on or from oblique angles to create abstract patterns of light on moving water. Depth is hard to achieve here, so use contrast—white feathers against dark blue, bubbles rising along fur—to emphasize dimensionality. Post-processing should include clarity reduction and tone curve adjustments to bring out atmosphere over detail.
• Architectural and Environmental Overviews
The Biodome's infrastructure is not just a shell—it's part of the visual story. Wide walkways, curved glass enclosures, and multilevel viewing platforms provide spatial drama. Use a 14–24mm lens to exaggerate lines and scale, particularly during off-peak times when human figures appear minimal and graphic. Look for light transitions between ecosystems, where the color temperature and material changes can divide your frame visually. Slow shutter speeds (1/10s or slower) allow you to blur passing visitors while keeping architectural elements crisp. Reflections off polished floors or glass panels offer symmetry. Compose vertically to showcase scale or horizontally to stretch the biome transitions across a panoramic format. Light pockets at stair landings and viewing decks often produce natural vignettes—ideal for creating visual emphasis.
Best Time to Visit
The Biodome is an indoor space, which means its photographic potential isn't dictated by weather but rather by crowd levels, lighting conditions within each habitat, and animal behavior cycles. Weekday mornings are ideal—both for lower foot traffic and for peak animal activity, particularly in the rainforest and forest exhibits. Lighting varies by biome, but the simulated diurnal cycles often place the best light in the first two to three hours after opening.
Seasonal changes still affect the Biodome in subtle ways. The Laurentian Forest exhibit mimics real-world seasonal shifts, with foliage color and light warmth changing accordingly. Visiting in autumn, for instance, offers a more saturated and warm visual palette compared to the stark tones of simulated winter. Holiday periods and weekends can bring heavy crowds that make longer exposures and low-angle shots challenging.
Tripods are not permitted, so plan accordingly with fast lenses and high ISO capability. Image stabilization is a must, and mirrorless systems with quiet shutters can give you an edge when working close to sensitive animals. The Biodome offers re-entry with a same-day ticket, so timing a return visit during a lull in crowds can be an effective strategy for difficult shots.
How to Get There
The Biodome is located in Montreal's Olympic Park, in the eastern part of the city, and is easily accessible by public transit. The nearest Metro station is Viau on the Green Line, which exits just steps from the Biodome entrance. For drivers, on-site parking is available for a fee, though it can fill quickly during weekends and holidays. Multiple bus routes also serve the area, making it an easy destination from downtown.
Entry requires a ticket through the Space for Life network. Timed entry slots are used to control crowd flow, so booking in advance is recommended—especially for morning sessions. There is no extra fee for photography, but flash and tripods are prohibited. Most areas are wheelchair-accessible, and amenities include lockers, restrooms, and a café for breaks between shooting sessions.
Gear for Biodome Shooting Versatility
Given the varied light conditions and subject types, versatility is key. A two-lens setup covering wide to telephoto—such as a 24–70mm f/2.8 and a 70–200mm f/2.8—will cover nearly every scene, from habitat overviews to close-ups of animal behavior. Consider a fast prime (35mm or 50mm f/1.4) for dim environments like the rainforest or underwater zones, where autofocus can struggle.
Bring a lens cloth and blower—humidity and mist can quickly fog or smudge your glass, especially in the tropical zone. A rubber lens hood or soft barrier helps eliminate reflections when shooting through glass. Image stabilization is crucial due to the handheld nature of most shooting. A cross-body camera strap or light harness keeps your hands free between setups while navigating crowded or narrow spaces.
Spare batteries and high-speed memory cards are essential for continuous burst shooting, especially in motion-heavy scenes. Use silent shutter modes when possible to avoid disturbing sensitive animals. If you're carrying two bodies, balance weight and consider switching between APS-C and full-frame for added reach flexibility.
Nearby Photography Locations
: Located just across from the Biodome, the garden offers diverse plant collections, themed pavilions, and seasonal floral events—ideal for macro and landscape work.
• Olympic Stadium and Tower
: The futuristic architecture of Montreal's Olympic facilities provides strong geometric forms and sweeping curves that contrast dramatically with natural subjects inside the Biodome.
: Recently renovated, the Insectarium showcases an exceptional variety of arthropods and offers controlled setups ideal for macro photography.
: This large urban park surrounding the complex is excellent for relaxed portrait sessions, seasonal foliage, and candid street-style photography.
: Just steps away, the minimalist interior architecture and ambient lighting design provide a sleek, abstract counterpoint to the organic forms found in the Biodome.
Though contained within a single shell, the Biodome offers an astonishing range of photographic subjects—from rainforest fauna and frozen coastlines to detailed textures and behavioral moments. It demands technical flexibility, creative framing, and a patient eye, rewarding those who treat its curated wilderness with the same attention they'd give the real thing.
Comments
Loading comments…