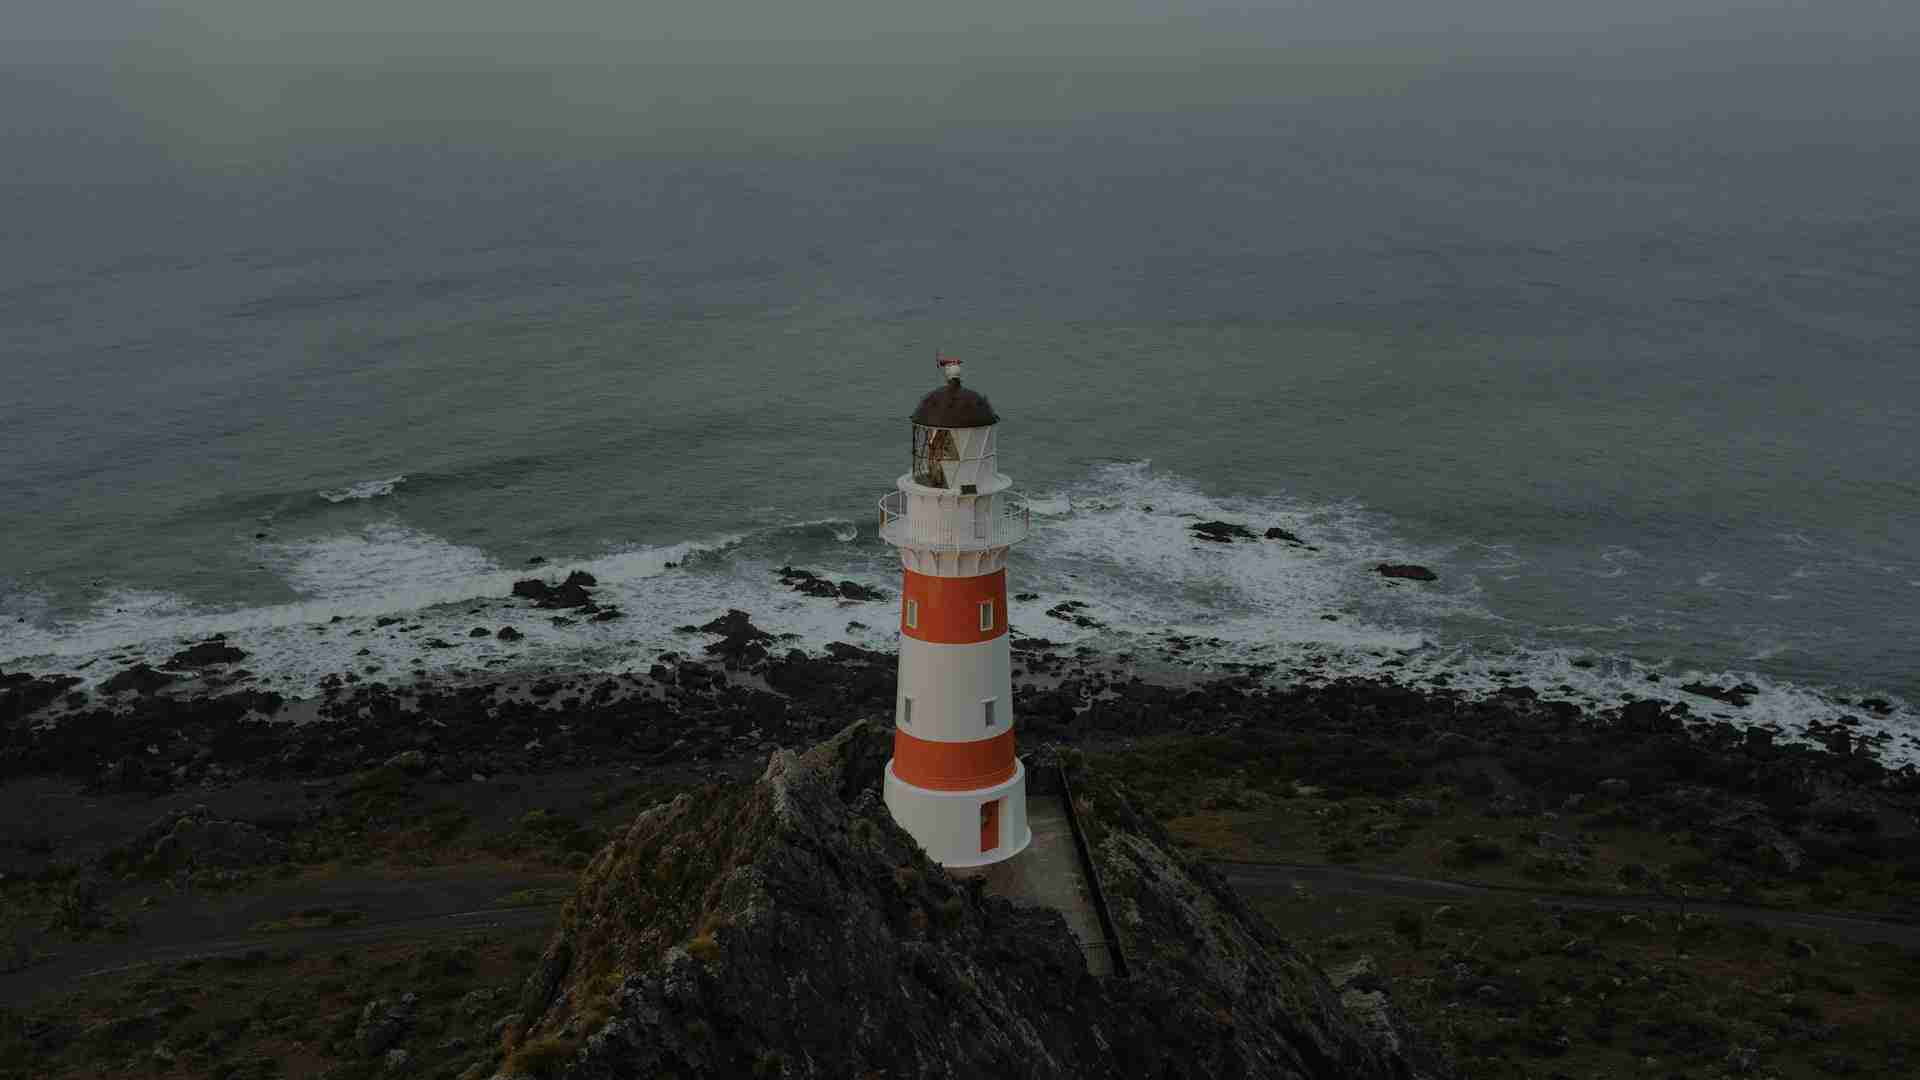
Coastal Beacon: A Photographer's Guide to Cape Palliser Lighthouse, New Zealand Standing sentinel over the southernmost tip of New Zealand's North Island, Cape Palliser Lighthouse is a striking red-and-white striped beacon perched atop a steep cliff face. Its isolated location, surrounded by craggy rocks, windswept seas, and abundant wildlife, makes it a dynamic setting for landscape and seascape photography. The 258-step staircase leading to the lighthouse not only adds visual drama but also offers evolving perspectives as you ascend. For photographers seeking raw natural beauty coupled with man-made structure, Cape Palliser Lighthouse provides an inspiring blend of contrast, motion, and form.
Best Photography Opportunities
• The Staircase Leading Up
Photographing the staircase is almost as rewarding as the lighthouse itself. Viewed from below, the steps form a serpentine line drawing the eye skyward, perfectly suited to wide-angle compositions. Use leading lines to guide viewers toward the summit. Side lighting during early morning or late afternoon reveals texture in the steps and cliff face, enhancing the dramatic incline. Consider including a figure in the frame for scale, especially with the vast coastal sky as a backdrop.
• Detailed Close-Ups of the Lighthouse Structure
Once at the top, turn your lens toward the lighthouse itself. The red dome and white base offer bold contrast against the surrounding blues of sea and sky. Use a standard zoom or mid-range prime lens to focus on the lantern, railing, rivets, and other industrial elements that show the structure's age and utility. Shooting in late afternoon reveals subtle color shifts on the paint and enhances the curvature of the tower with natural shadowing.
• Expansive Ocean and Cliff Vistas
From the top of the staircase, turn away from the lighthouse to capture breathtaking views of the Pacific Ocean and dramatic cliffs. A wide-angle lens (16 to 35mm) allows you to encompass the curve of the shoreline, waves smashing into rocks, and distant hills softened by mist. Compose with the lighthouse off center to show scale against the vastness of the landscape. Golden hour and blue hour deliver stunning results, with vibrant color gradients and soft edges.
• Seal Colonies and Coastal Wildlife
Just below the cliffs, New Zealand fur seals haul out along the rocky beaches. A telephoto lens (100 to 400mm) is essential for photographing these animals without disturbing them. Focus on behavior, such as mothers with pups, seals sunning on warm rock, or sparring males. A fast shutter speed (1/1000s or more) ensures sharp captures of movement. Coastal birds also frequent the area, so watch for flight paths and perched seabirds silhouetted against the waves.
• Silhouettes and Light Trails at Night
On clear nights, the lighthouse becomes a brilliant foreground subject against a star-filled sky. Position yourself to capture the lighthouse in silhouette as the Milky Way arcs above. Use long exposures (15 to 30 seconds) with a fast wide-angle lens (f/2.8 or faster). If you're comfortable light painting, you can gently illuminate the stairs or surrounding rocks to add dimensionality. Avoid lighting the lighthouse directly to preserve its silhouette.
Best Time to Visit
Cape Palliser Lighthouse is visually rewarding at any time of year, but each season offers unique photographic advantages. Summer, from December to February, delivers the most consistent weather and longest daylight hours, ideal for extended golden hour sessions. Autumn, from March to May, brings more dramatic skies and fewer visitors, with moody coastal light that suits both color and black and white photography.
Winter, from June to August, introduces crisp, clear nights for astrophotography and often dramatic sea conditions. Mornings can be cold but yield vivid color during sunrise as the sky ignites over the Pacific. Spring, from September to November, blends new vegetation and active wildlife, especially seal pups along the shore.
The best times of day are early morning for side lit staircase compositions and seal activity, and late afternoon for golden light on the tower. Evenings and nights offer excellent opportunities for silhouettes and long exposures. Use tidal charts to plan low tide walks near the seal colony and check cloud cover forecasts for night photography. Overcast days also lend themselves well to high contrast black and white images of the cliffs and waves.
How to Get There
Cape Palliser Lighthouse is located approximately 75 kilometers south of Martinborough on the North Island. From Martinborough, take Lake Ferry Road and continue onto Cape Palliser Road, a narrow and winding route that becomes unsealed in sections. Drive cautiously, especially after heavy rain, as gravel surfaces can be slick.
Parking is available at the base of the cliff, near a small information area. From there, the lighthouse is accessed via 258 steep concrete steps. The climb takes about 15 to 20 minutes. Wear sturdy shoes and bring water, especially during summer. The lighthouse and stairs are open to the public year-round at no cost. Be mindful of wind conditions, which can be strong and gusty, particularly at the top.
Recommended Gear for Lighthouse and Coast
Bring a stable tripod capable of withstanding coastal wind for long exposures and night photography. A wide-angle lens (16 to 35mm) is essential for encompassing both the lighthouse and the expansive sea views. A standard zoom (24 to 70mm) works well for structural detail and mid-range compositions, while a telephoto lens (100 to 400mm) is crucial for capturing seals, birds, and distant cliffs.
Pack a circular polarizer to enhance the blues of the ocean and reduce glare from wet rocks. Neutral density filters (3 to 6 stop) allow you to experiment with longer exposures during the day, smoothing waves and creating dramatic skies. Extra batteries and memory cards are critical, especially if you're planning sunrise to night sessions. Keep a microfiber cloth handy for clearing sea spray, and consider rain covers or a weatherproof bag for both yourself and your gear.
Headlamps with red light modes are helpful for early morning or late night navigation, and trekking poles can provide stability during the steep ascent and descent. Layered clothing and wind protection are recommended due to sudden weather shifts.
Nearby Photography Locations
• Putangirua Pinnacles Scenic Reserve
A 30 minute drive from the lighthouse, these eerie, fluted rock formations provide a completely different landscape. Best shot in low light, they cast deep shadows and create otherworldly compositions, especially in black and white.
Where Lake Onoke meets the sea, this estuarine environment features reflective water, birdlife, and long horizon lines. Ideal for tranquil sunrise or misty morning captures.
This nearby hamlet of rusted bulldozers and colorful boats offers gritty, photogenic charm. Use a documentary approach to capture the textures and life of this working coastal community.
Situated at the base of the cliffs, this active colony offers dynamic wildlife photography. Low tide exposes more rock platforms, allowing you to capture intimate seal behavior without crowding the animals.
On your return north, pause in Martinborough to photograph rows of grapevines backed by rolling hills. The soft light of early evening brings out the textures and warm tones of the vineyard landscape.
Comments
Loading comments…