
Set against the raw southern coastline of New Zealand's South Island, Waipapa Point Lighthouse stands alone on a grassy headland where wind, sea, and sky converge. Built in the late nineteenth century after one of the country's worst maritime disasters, the lighthouse remains active and accessible, offering photographers a rare opportunity to work close to both structure and seascape without visual obstruction. The surrounding landscape is open and elemental, defined by low dunes, native grasses, and rugged rock shelves that extend into the tide. This is a location where weather moves quickly and light changes often, rewarding repeat visits and close attention to wind direction, cloud form, and the motion of waves across the rocks.
Best Photography Opportunities
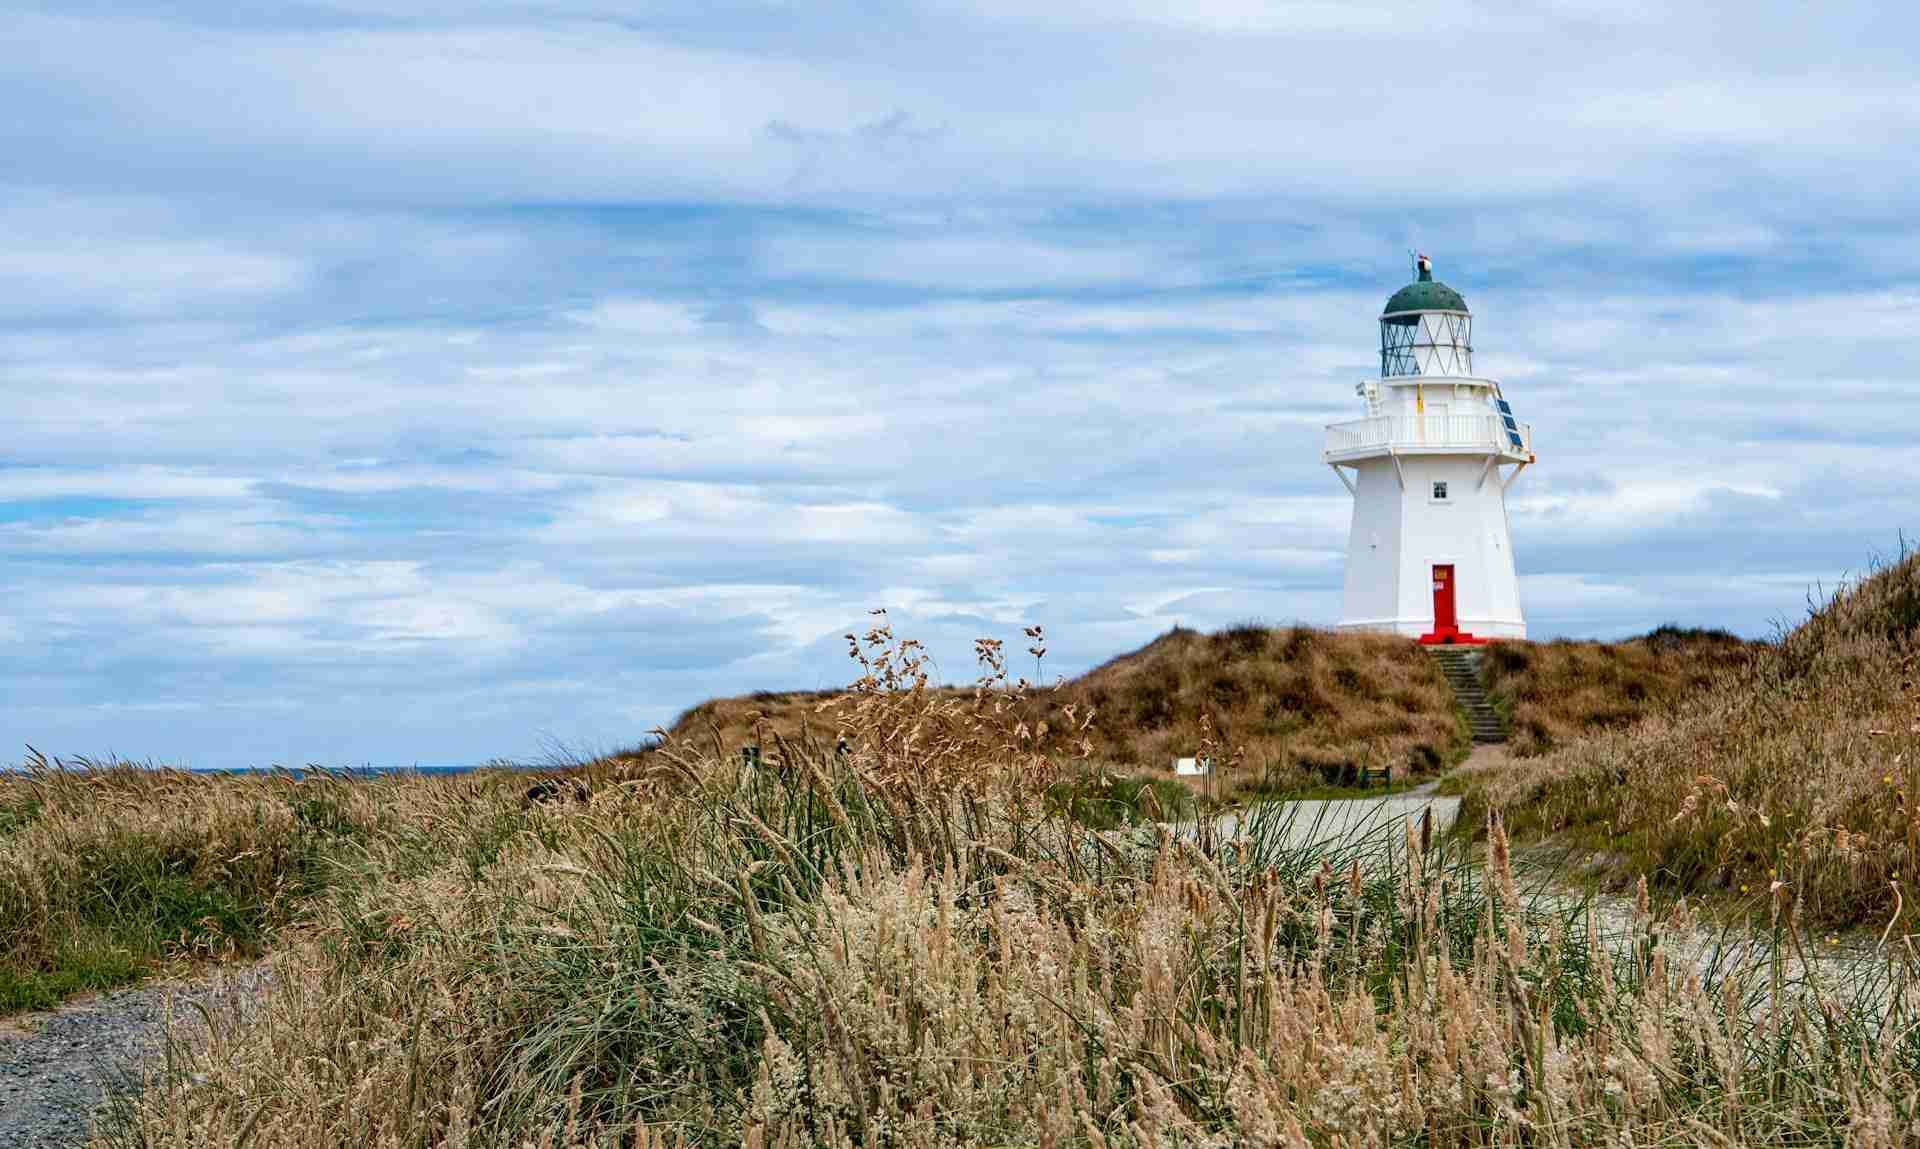
Side Light on the Lighthouse Structure
The lighthouse itself is compact and well-proportioned, painted in white with a red base and lantern housing that stands out against coastal skies. The best compositions come during golden hour when the low sun brushes across the western face and casts long shadows into the grass. From the southern and southeastern approach paths, you can frame the structure against the sea with clean foreground lines and a low horizon. A medium zoom lens offers control of the frame, helping you avoid visual clutter while maintaining strong lines in the grass and tower. Use a polarizer carefully here to enhance sky contrast, but watch for uneven tonality if working wide.
Rock Shelf and Ocean Movement at Low Tide
The flat rock shelves just below the lighthouse offer excellent opportunities for long exposure seascapes. These rocks are exposed at low tide and form channels and cracks that lead the eye toward the horizon. With an overcast sky or soft evening light, you can use shutter speeds of several seconds to blur the water and bring out the shape of the stone. A tripod is essential, and a neutral density filter helps extend exposure time. This location works well for minimalist compositions that emphasize the meeting point of sea and stone, especially when using a mid-range focal length to compress depth slightly.
Storm Light and Cloud Drama
Waipapa Point sits directly in the path of incoming weather systems from the Southern Ocean. Storm clouds often stack and break quickly here, creating strong directional light and cloud textures that work beautifully in both color and black and white. Positioning the lighthouse off-center allows you to use the structure as a visual anchor while giving space to the sky above. A wide-angle lens works well in these conditions, especially when shooting low with grass or shoreline rocks as foreground. Keep gear protected and use a lens hood to control flare and raindrops when working between showers.
Silhouettes at Dusk from the Eastern Dune
As the sun sets to the west, photographers standing on the low eastern rise behind the lighthouse can capture clean silhouettes of the structure with the ocean and sky beyond. This angle is strongest when the sun dips below cloud cover late in the day and casts a final orange or gold glow across the sea. Use a longer focal length to compress the frame and emphasize the shape of the lantern against the sky. Silhouettes work best with precise alignment, so use a tripod and live view to fine-tune composition. This is also a good time for handheld bracketed exposures if you plan to build a balanced HDR image later.
Detail and Texture Studies in Morning Fog
When fog rolls in from the coast, which happens frequently during cooler months, the scene shifts dramatically. The white of the lighthouse blends into the mist, and the surrounding grass and fence lines take on stronger definition. These conditions are perfect for texture-driven images with soft contrast and a limited tonal palette. Macro and short telephoto lenses help isolate architectural details such as the lantern base, paint texture, or the weathered fence posts leading toward the water. Work slowly and watch for breaks in the fog that let light in through narrow bands, creating separation in the frame.
Best Time to Visit
The most productive light at Waipapa Point arrives in the early morning and late afternoon when the sun sits low along the horizon and casts long side light across the headland. From September through April, golden hour conditions often extend for over an hour, offering plenty of time to work with changing angles and exposure. Mornings are typically calmer and bring soft, diffuse light if marine fog is present. This fog often lifts slowly, revealing the lighthouse and shoreline in stages, which can create a dramatic transition of mood across a single session.
Autumn and spring deliver the widest range of weather and sky variation. These seasons bring quick-moving systems from the southwest, which can lead to fast shifts in light and texture. Photographers who are willing to wait out showers often find the strongest results during clearing storms or late afternoon breaks in the clouds.
Summer brings longer days and more stable weather, but also stronger winds and fewer dramatic skies. Plan to shoot early or late to avoid flattened light, and bring a weight for your tripod if gusts are present. Winter offers fewer daylight hours and occasional frost on the grass at sunrise. This season rewards black and white work and minimalist compositions with cold, clean skies and empty beaches.
How to Get There
Waipapa Point Lighthouse is located near the southern tip of New Zealand's South Island, approximately 45 kilometers southeast of Invercargill. From Invercargill, follow State Highway 92 east to Otara, then take the Waipapa Lighthouse Road south to the coast. The road is sealed most of the way and turns to well-maintained gravel near the end. A parking area sits just a few hundred meters from the lighthouse, with an easy footpath leading across flat grassland to the site.
There are no entrance fees or permits required to photograph the lighthouse or surrounding area. Tripods are allowed, and there are no restrictions on shooting times. The site is open year-round, but weather conditions can change rapidly. Bring waterproof clothing and check local forecasts before visiting. The location remains accessible even in rain, though strong winds are common and should be factored into equipment setup and safety considerations.
Recommended Photography Gear
A 24 to 70 millimeter lens will cover most lighthouse compositions from near and mid-range distances, offering sharp detail while preserving scale. For expansive views that include sky or surf, a wide-angle lens in the 16 to 35 millimeter range allows for low-angle framing and dramatic sky treatments. A 70 to 200 millimeter lens is valuable for isolating the structure against shifting clouds or working with compressed layers of sea, stone, and sky.
A sturdy tripod is essential, especially when shooting long exposures or working in wind. A remote shutter release or timer function will help eliminate vibration. A six to ten stop neutral density filter is useful for slowing shutter speeds and smoothing ocean motion, particularly on overcast days. A circular polarizer can help manage glare in the sky and along the wet rocks but should be used cautiously when working wide to avoid banding in uneven skies.
Bring a lens cloth and blower to manage sea spray and moisture on windy days. A weather-sealed backpack and protective covers for your gear are highly recommended. Wear waterproof boots with good tread, especially if you plan to photograph from the lower rock shelf. Gloves, a windbreaker, and layers are necessary throughout the year, as temperatures and wind conditions can change suddenly even on calm mornings.
Nearby Photography Locations
Just east of Waipapa Point, Slope Point marks the southernmost tip of the South Island and offers wind-shaped trees, expansive ocean views, and a remote coastal feel. The road in is unsealed, but the viewpoint itself is a short walk from the car park. Best visited at sunrise or on overcast days for strong form and texture work.
Located within the Catlins region, Curio Bay is known for its petrified forest and tidal rock formations. During low tide, patterns in the fossilized trees become visible and provide excellent foreground subjects. Sunset light across the bay adds warmth and contrast to the cool stone textures.
Just northwest of Waipapa Point, the Fortrose area features coastal cliffs, dramatic erosion patterns, and strong western light in the afternoon. It is a useful location for shooting wider coastal frames with graphic lines and ocean motion. The area is quiet and less visited, offering time to explore without interruption.
This bay offers a curved beach and broad horizon line, with frequent sightings of Hector's dolphins near shore. In calm conditions, you can frame clean long exposures of water movement or use the curve of the shoreline to lead the eye across the frame. Mornings here are best for soft sky reflections and mist along the surf line.
This small center near Curio Bay includes viewpoints over rocky bluffs and sweeping coastal plains. It is especially productive in early evening when shadows stretch across the grassland and the ocean catches low golden light. Use a telephoto lens here to isolate sea stacks and rock forms against the brighter background water.
Waipapa Point Lighthouse is not just a marker of coastal safety. It is a photographer's anchor in a landscape shaped by wind, water, and time. With open skies, changing light, and room to move freely through composition and mood, it offers both structure and openness. For those who enjoy working with shifting elements and solitary settings, this stretch of Southland coast delivers both clarity and challenge in equal measure.
Comments
Loading comments…