Dallas is a city of contrasts, blending modern skyscrapers with historic charm and vibrant artistic expression. For professional and semi-pro photographers, the city offers an array of stunning locations to capture. Whether you're seeking skyline vistas, urban street art, or architectural marvels, Dallas has something for every photographer. Below are ten of the best photo spots in Dallas, with tips on how to make the most of your shoot.
1. Edgefield Bridge – Dallas Skyline View
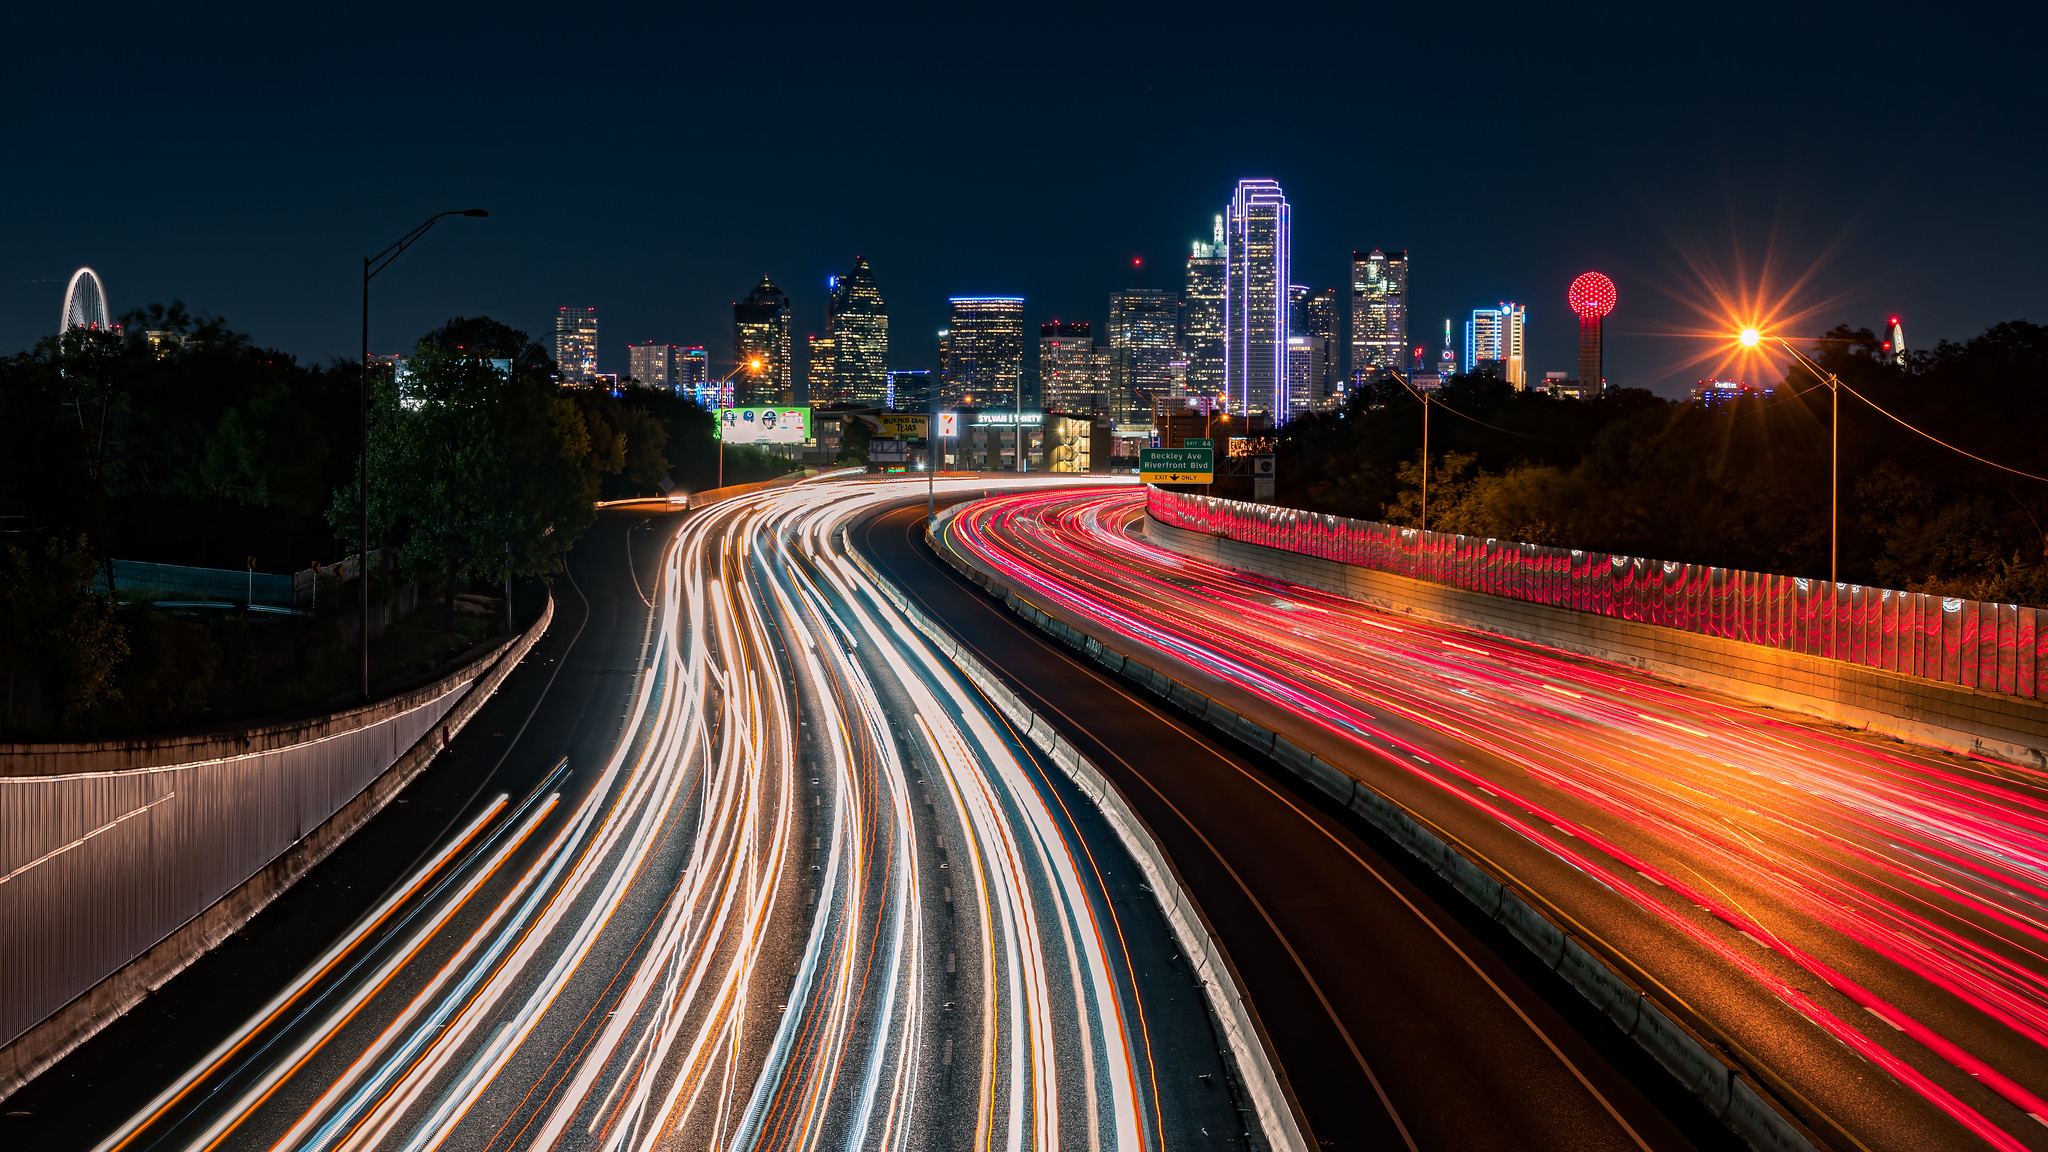
Dallas City Skyline from Edgefield Bridge- Photo by Shiva Shenoy
For a breathtaking panoramic shot of the Dallas skyline, Edgefield Bridge is an unbeatable location. The bridge, located in West Dallas, provides a clear and unobstructed view of the city's high-rises, best captured during sunset or the blue hour when the city lights start to glow.
📷 Photo Tip
Use a tripod for long-exposure shots to capture the light trails of passing cars. Arrive early to secure a spot, as the bridge can get busy with photographers.
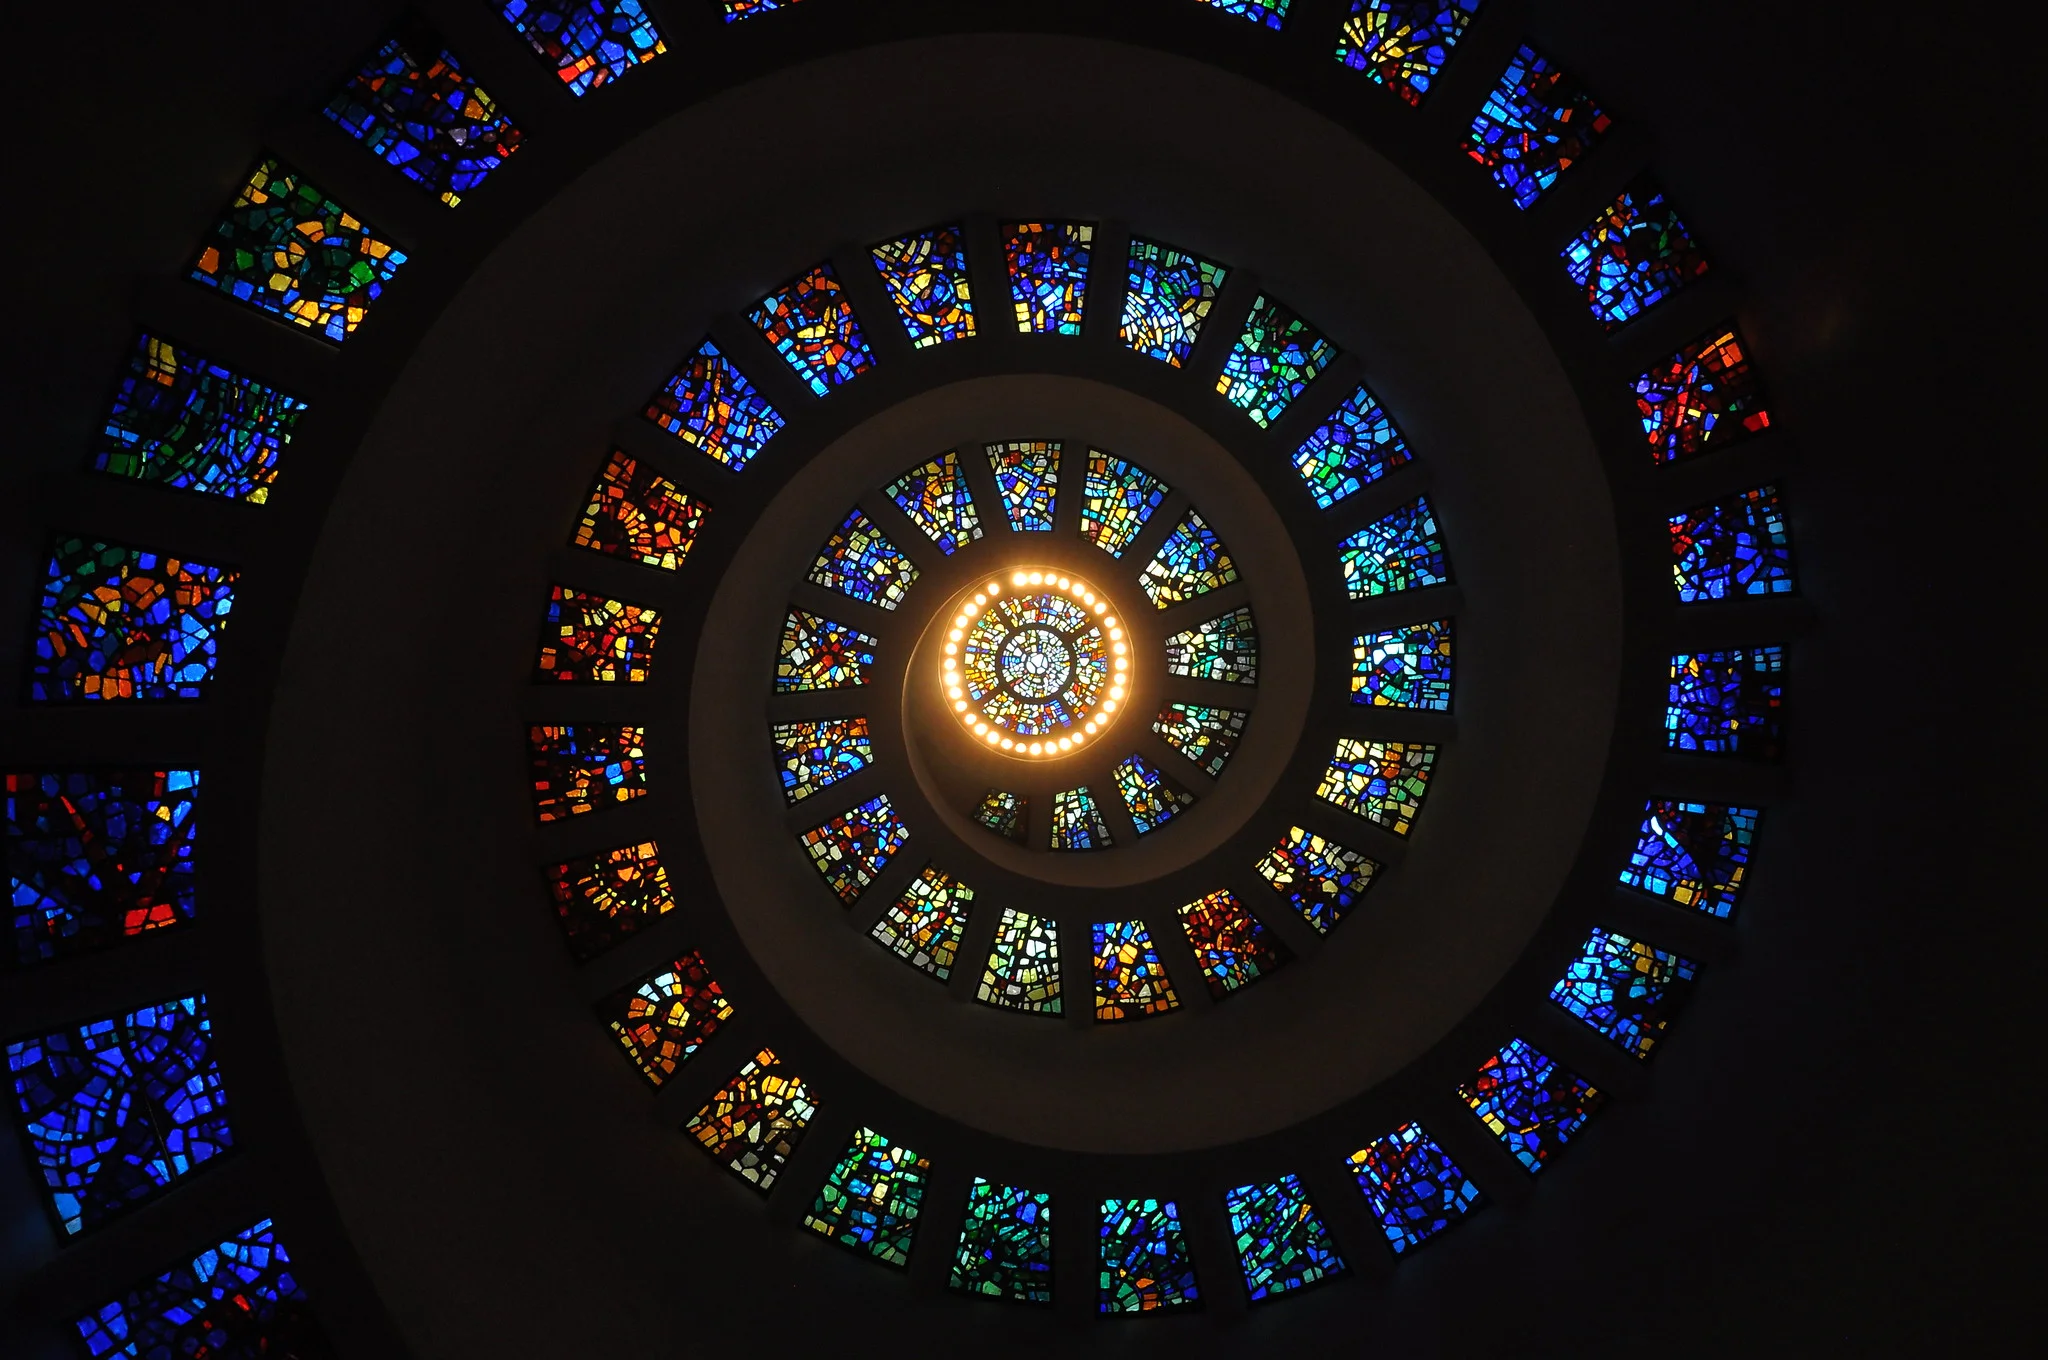
Nestled in the heart of downtown Dallas, the Chapel of Thanksgiving is a hidden architectural gem featuring the breathtaking *Glory Window*, a spiral stained-glass masterpiece designed to evoke a sense of peace and reflection. The chapel, part of Thanks-Giving Square, offers a unique interior filled with soft, colorful light streaming through the stained glass, making it an ideal location for architectural and abstract photography. The chapel is typically open Monday through Saturday from 10 AM to 4 PM, but hours can vary, so check ahead before visiting. For the best lighting conditions, early morning or late afternoon is ideal, as the sunlight filtering through the stained glass is less harsh, allowing for richer color saturation and softer shadows.
📷 Photo Tip
Bring a fast lens (f/2.8 or wider) to capture the full vibrancy of the stained glass in low-light conditions. A tripod may not be allowed inside, so use a camera with good image stabilization or a higher ISO setting to maintain sharpness. To emphasize the spiral design of the *Glory Window*, consider shooting from directly underneath with a wide-angle lens (14-24mm) for a dramatic, symmetrical composition.
The Dallas Arboretum and Botanical Garden is a breathtaking 66-acre oasis on the shores of White Rock Lake, offering a diverse range of floral landscapes, seasonal exhibits, and serene water features. From vibrant tulip fields in the spring to fiery autumn foliage, this location provides endless opportunities for nature, macro, and landscape photography. The Arboretum is open daily from 9 AM to 5 PM, with extended hours during special events. The best time to visit for photography is early morning when the light is soft and the crowds are minimal, or golden hour in the late afternoon for warm, dreamy lighting. Spring and fall are the most photogenic seasons due to the ever-changing floral displays.
📷 Photo Tip
Use a macro lens (90mm-105mm) to capture intricate details of flowers and insects, or a wide-angle lens (16-35mm) for sweeping garden landscapes. Arrive early to take advantage of morning dew and diffused light, and if shooting near water features, consider using a polarizing filter to reduce glare and enhance reflections.
📍 Explore on PIXEO Map →
4. Reunion Tower
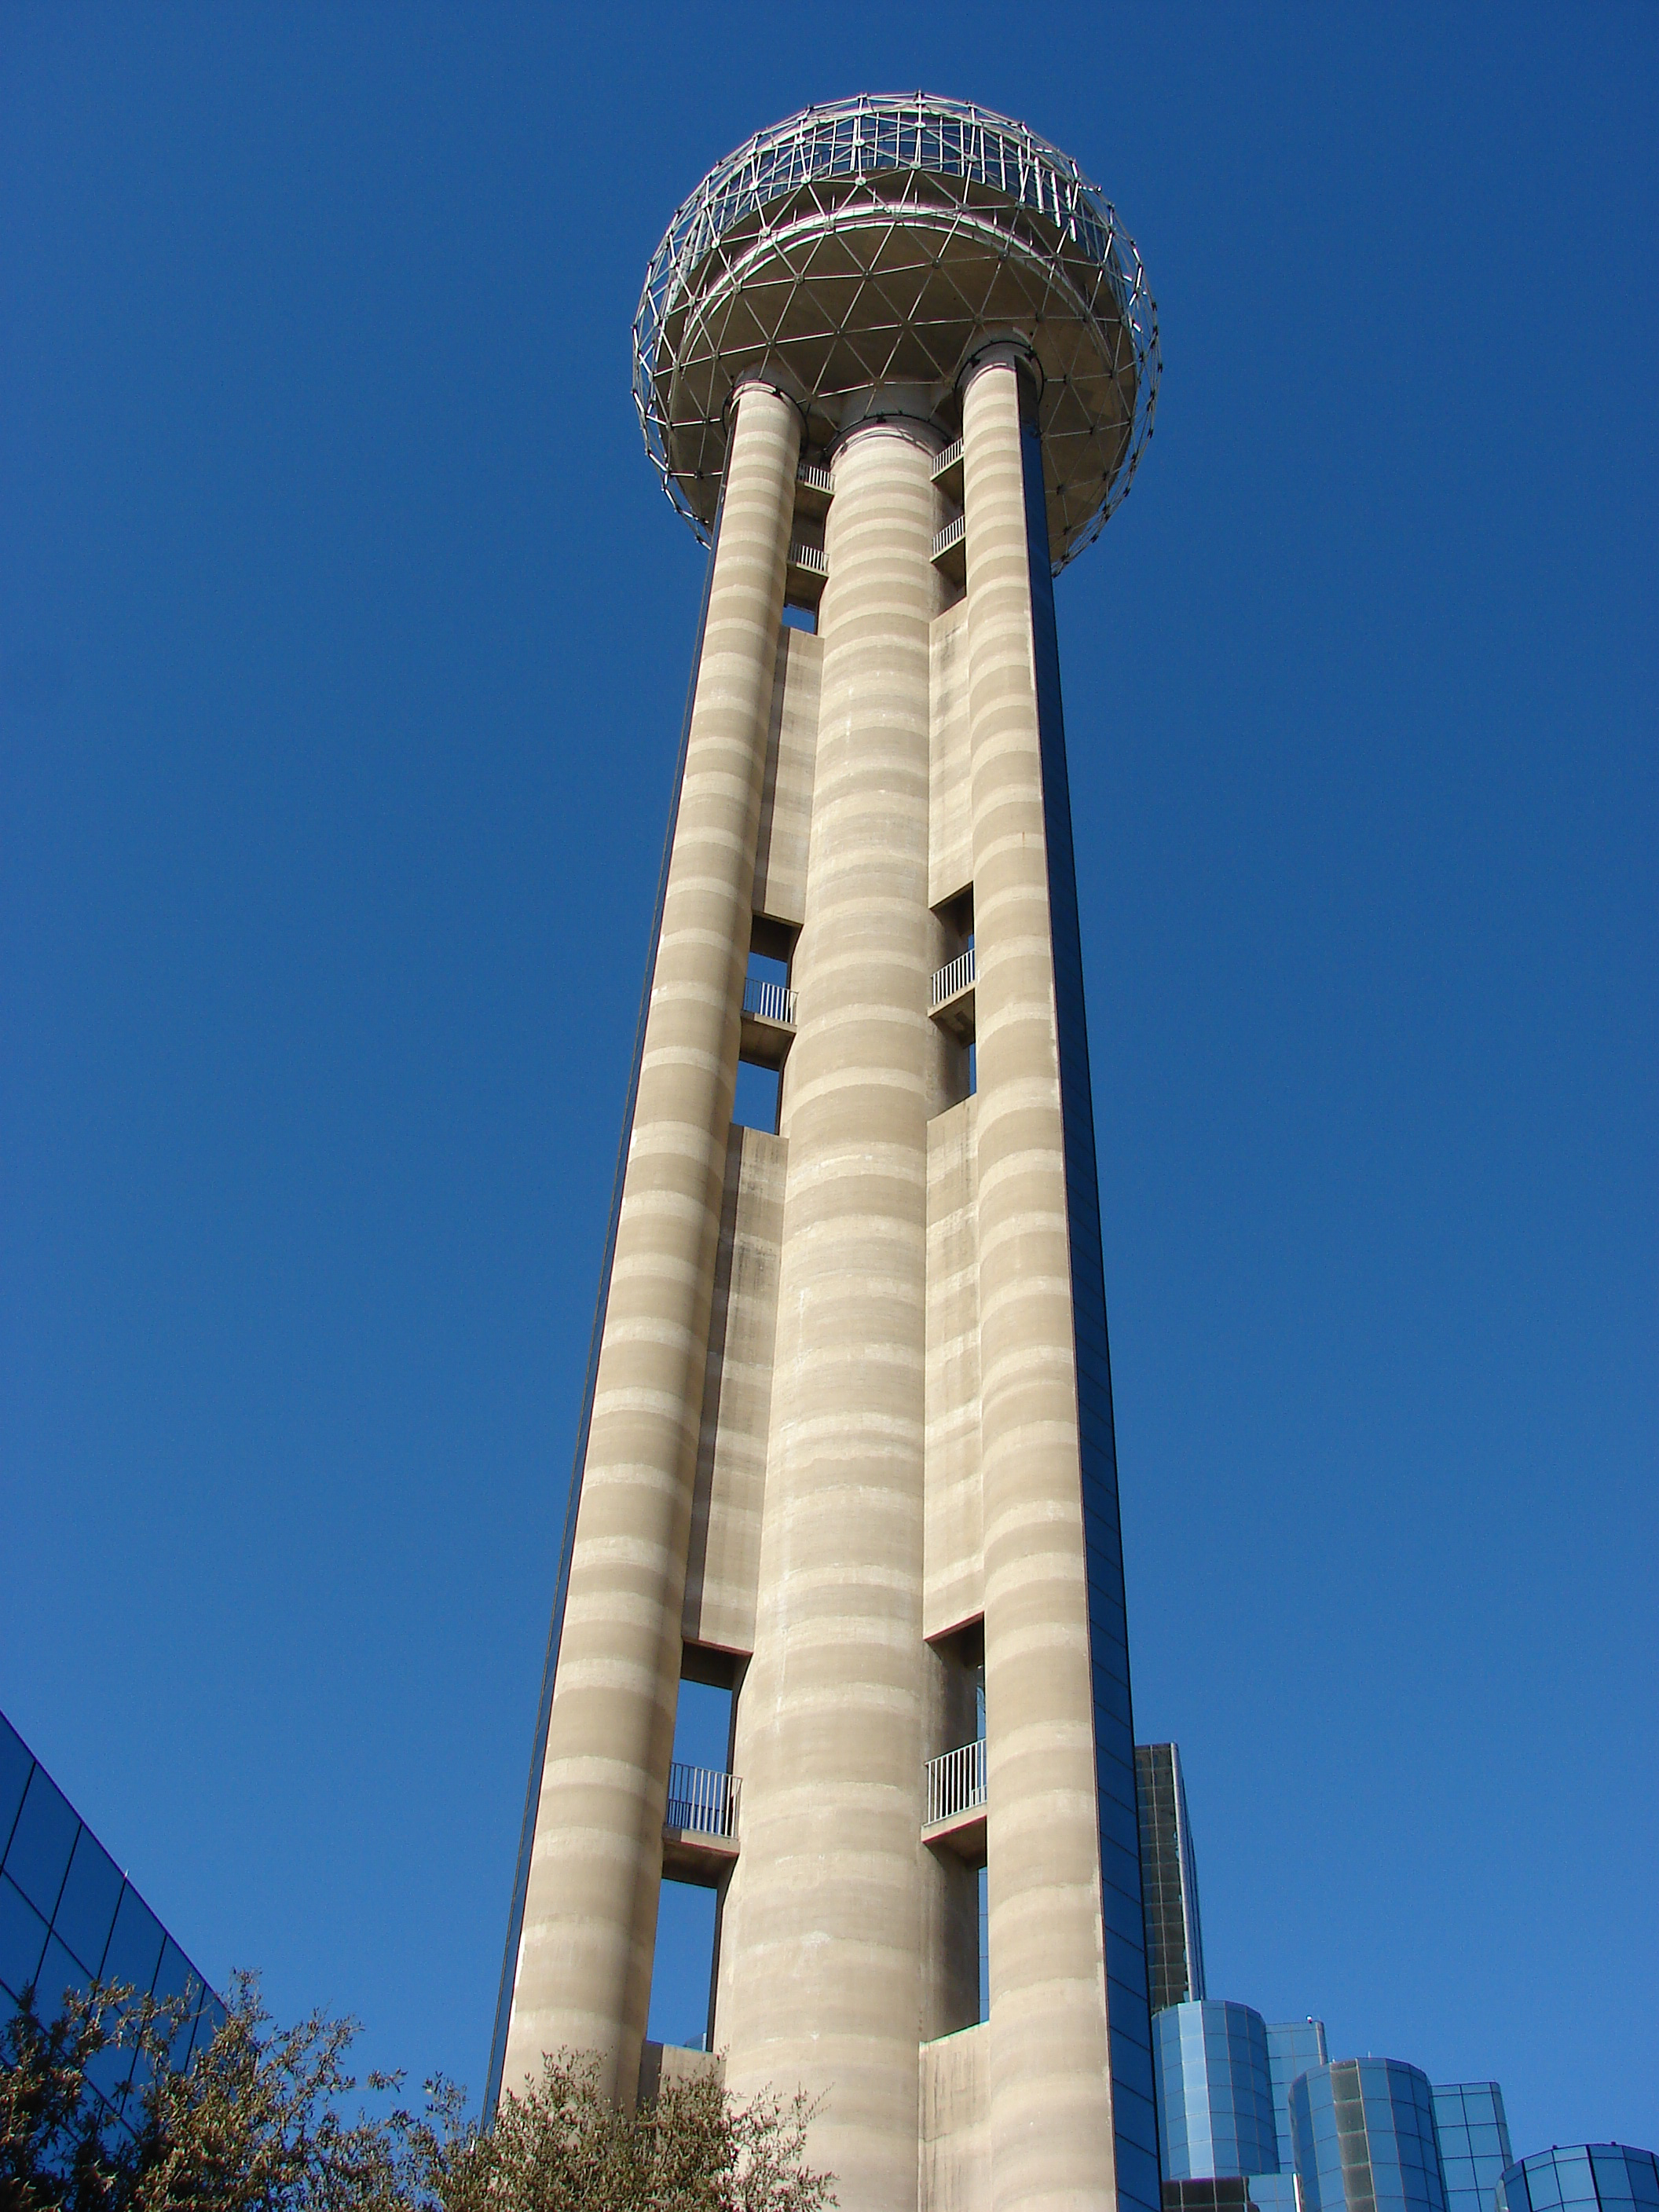
Reunion Tower - Photo by David R. Tribble
One of the most iconic landmarks in Dallas, Reunion Tower offers an unparalleled 360-degree panoramic view of the city skyline from its GeO-Deck observation deck. Rising 470 feet above downtown, this unique structure is the perfect spot for cityscape photography, with stunning perspectives of Dallas' skyscrapers, bridges, and highways. The sunset and nighttime views are particularly breathtaking as the city lights illuminate the urban landscape. The best times to photograph Reunion Tower are during golden hour (shortly after sunrise or before sunset) when the soft light enhances the building’s texture and structure, or at night when the LED lights create a dynamic visual display. Special lighting themes often celebrate local events, holidays, and sports victories, adding variety to your shots.
📷 Photo Tip
Use a telephoto lens (70-200mm) from a distance to compress the scene and make the tower stand out among the skyline. For up-close shots, a wide-angle lens (16-35mm) will help you emphasize the tower’s towering height. If shooting at night, use a tripod and a long exposure (5-10 seconds) to capture the glowing LED lights without motion blur. For a unique reflection shot, head to Trinity Overlook Park or the Hyatt Regency's glass facade to capture Reunion Tower mirrored in nearby surfaces.
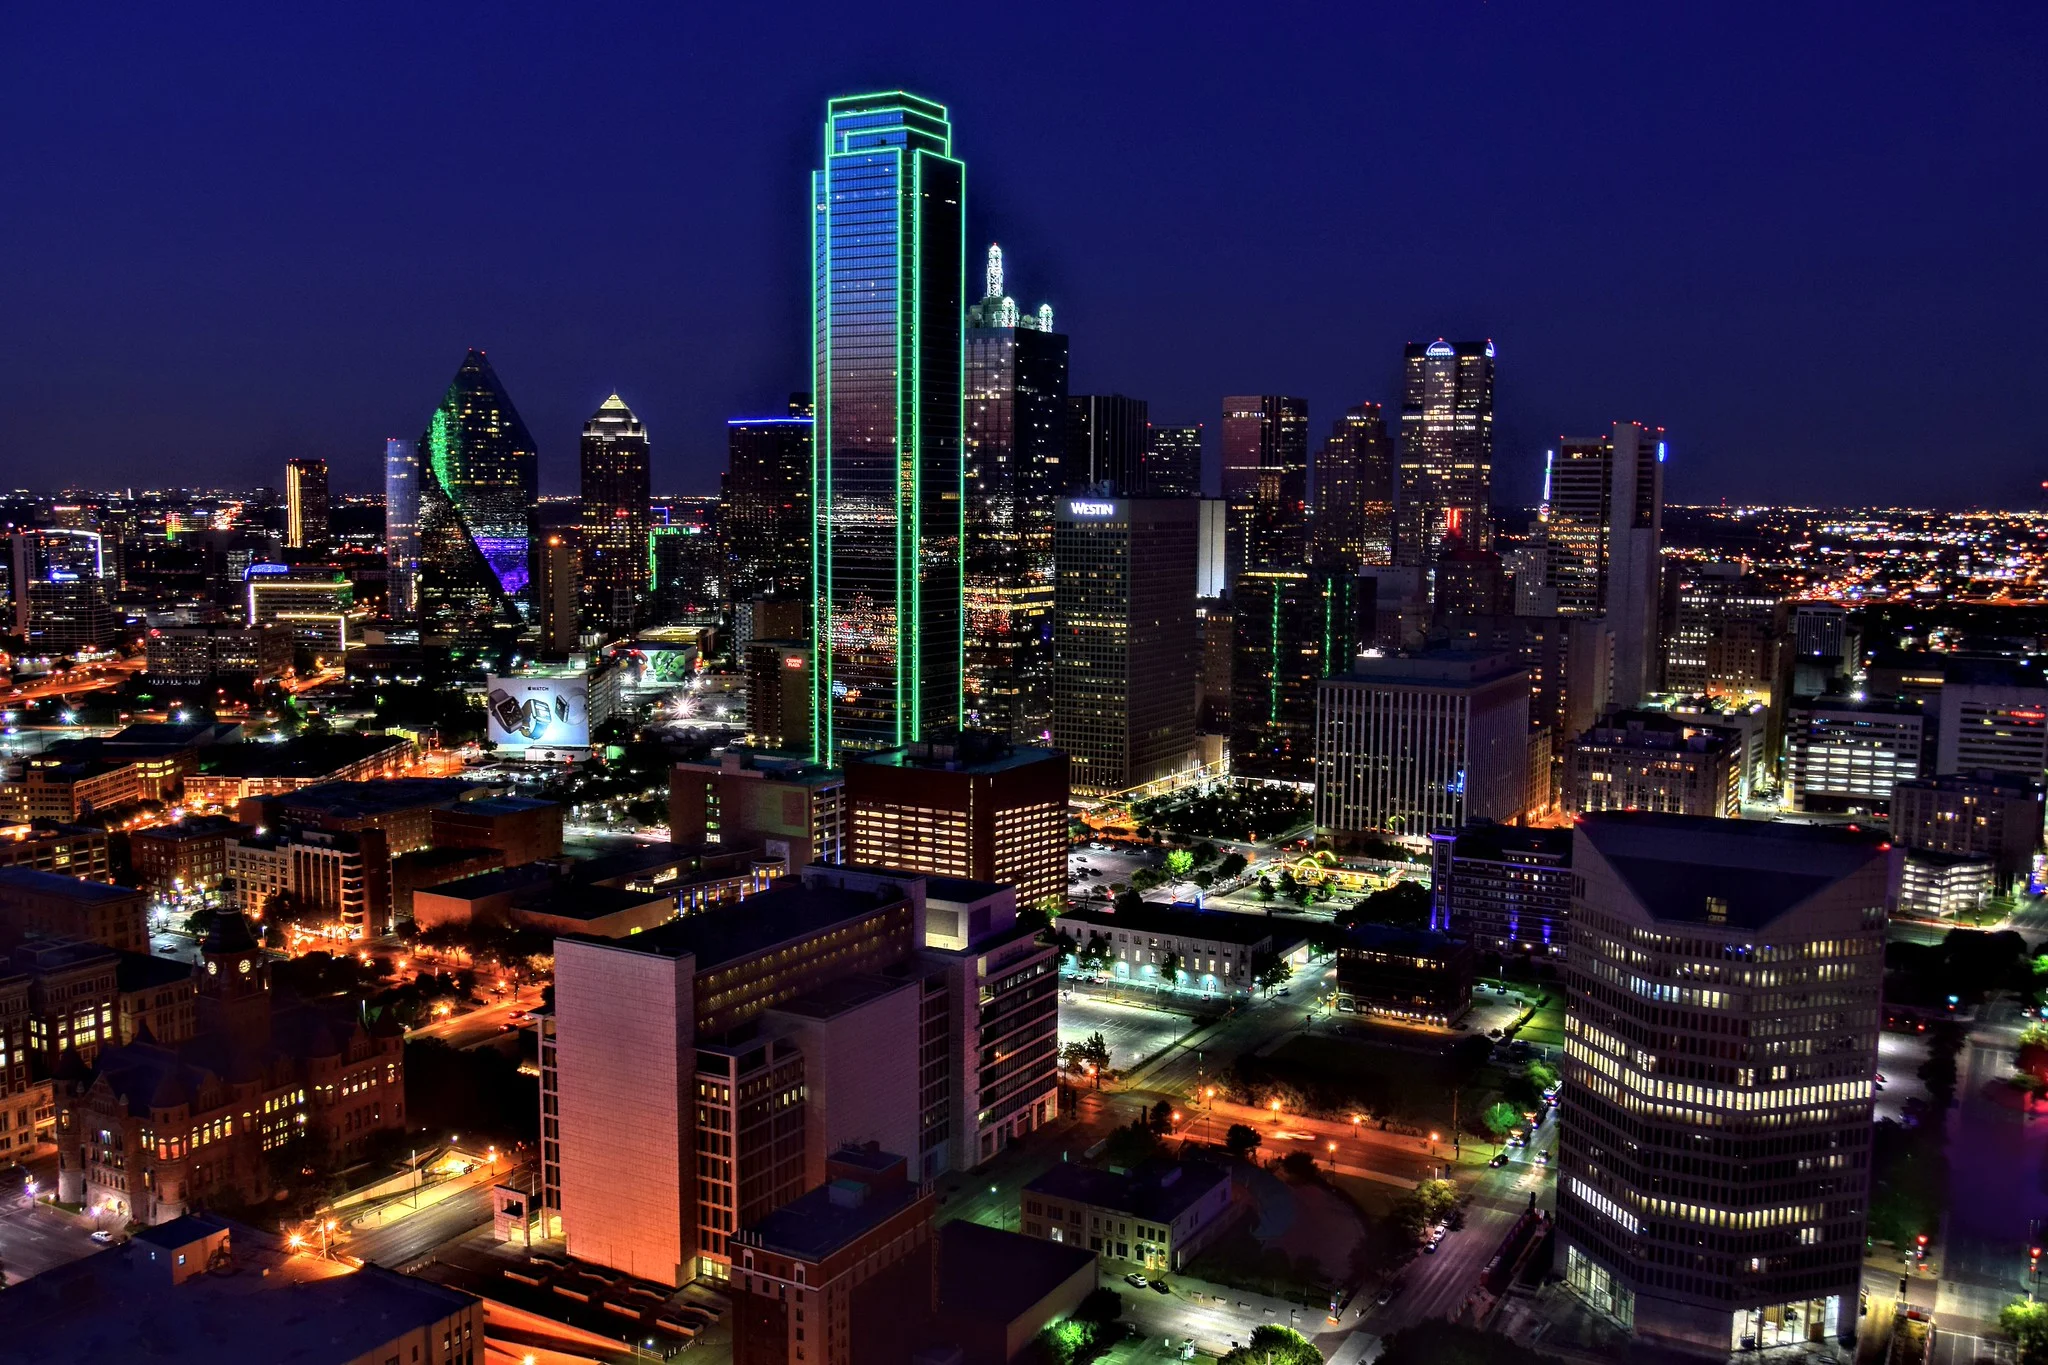
Beyond being an architectural icon itself, Reunion Tower offers one of the most spectacular panoramic views of the Dallas skyline from its GeO-Deck observation deck. At 470 feet above the city, this location provides a bird’s-eye view of Dallas’ modern high-rises, historic buildings, and winding highways. The skyline stretches out before you, making this a must-visit spot for cityscape photographers looking to capture the essence of Dallas from above.
📷 Photo Tip
Reunion Tower is open most days from noon to 7:30 PM, meaning your best opportunities for photography will depend on the season:
- Golden Hour & Sunset: Ideal for warm, dramatic lighting. In spring and summer (March–August), sunset occurs after 7:30 PM, making it difficult to capture from the deck. However, in fall and winter (September–February), sunset typically happens between 5:30 and 6:30 PM, allowing for stunning golden hour shots before closing.
- Night Photography: The best time for night shots from Reunion Tower is in late fall and winter, when the sun sets earlier, letting you capture the illuminated cityscape before the tower closes.
Use a polarizing filter during daylight hours to reduce glare and enhance contrast. For night photography, bring a fast lens (f/2.8 or wider) and experiment with long exposures (10-30 seconds) to capture light trails from moving traffic and the illuminated skyline. Since tripods are not allowed, stabilize your camera against railings or use a high ISO with noise reduction. A wide-angle lens (16-35mm) will help you capture the entire city, while a telephoto lens (70-200mm) can isolate iconic buildings.
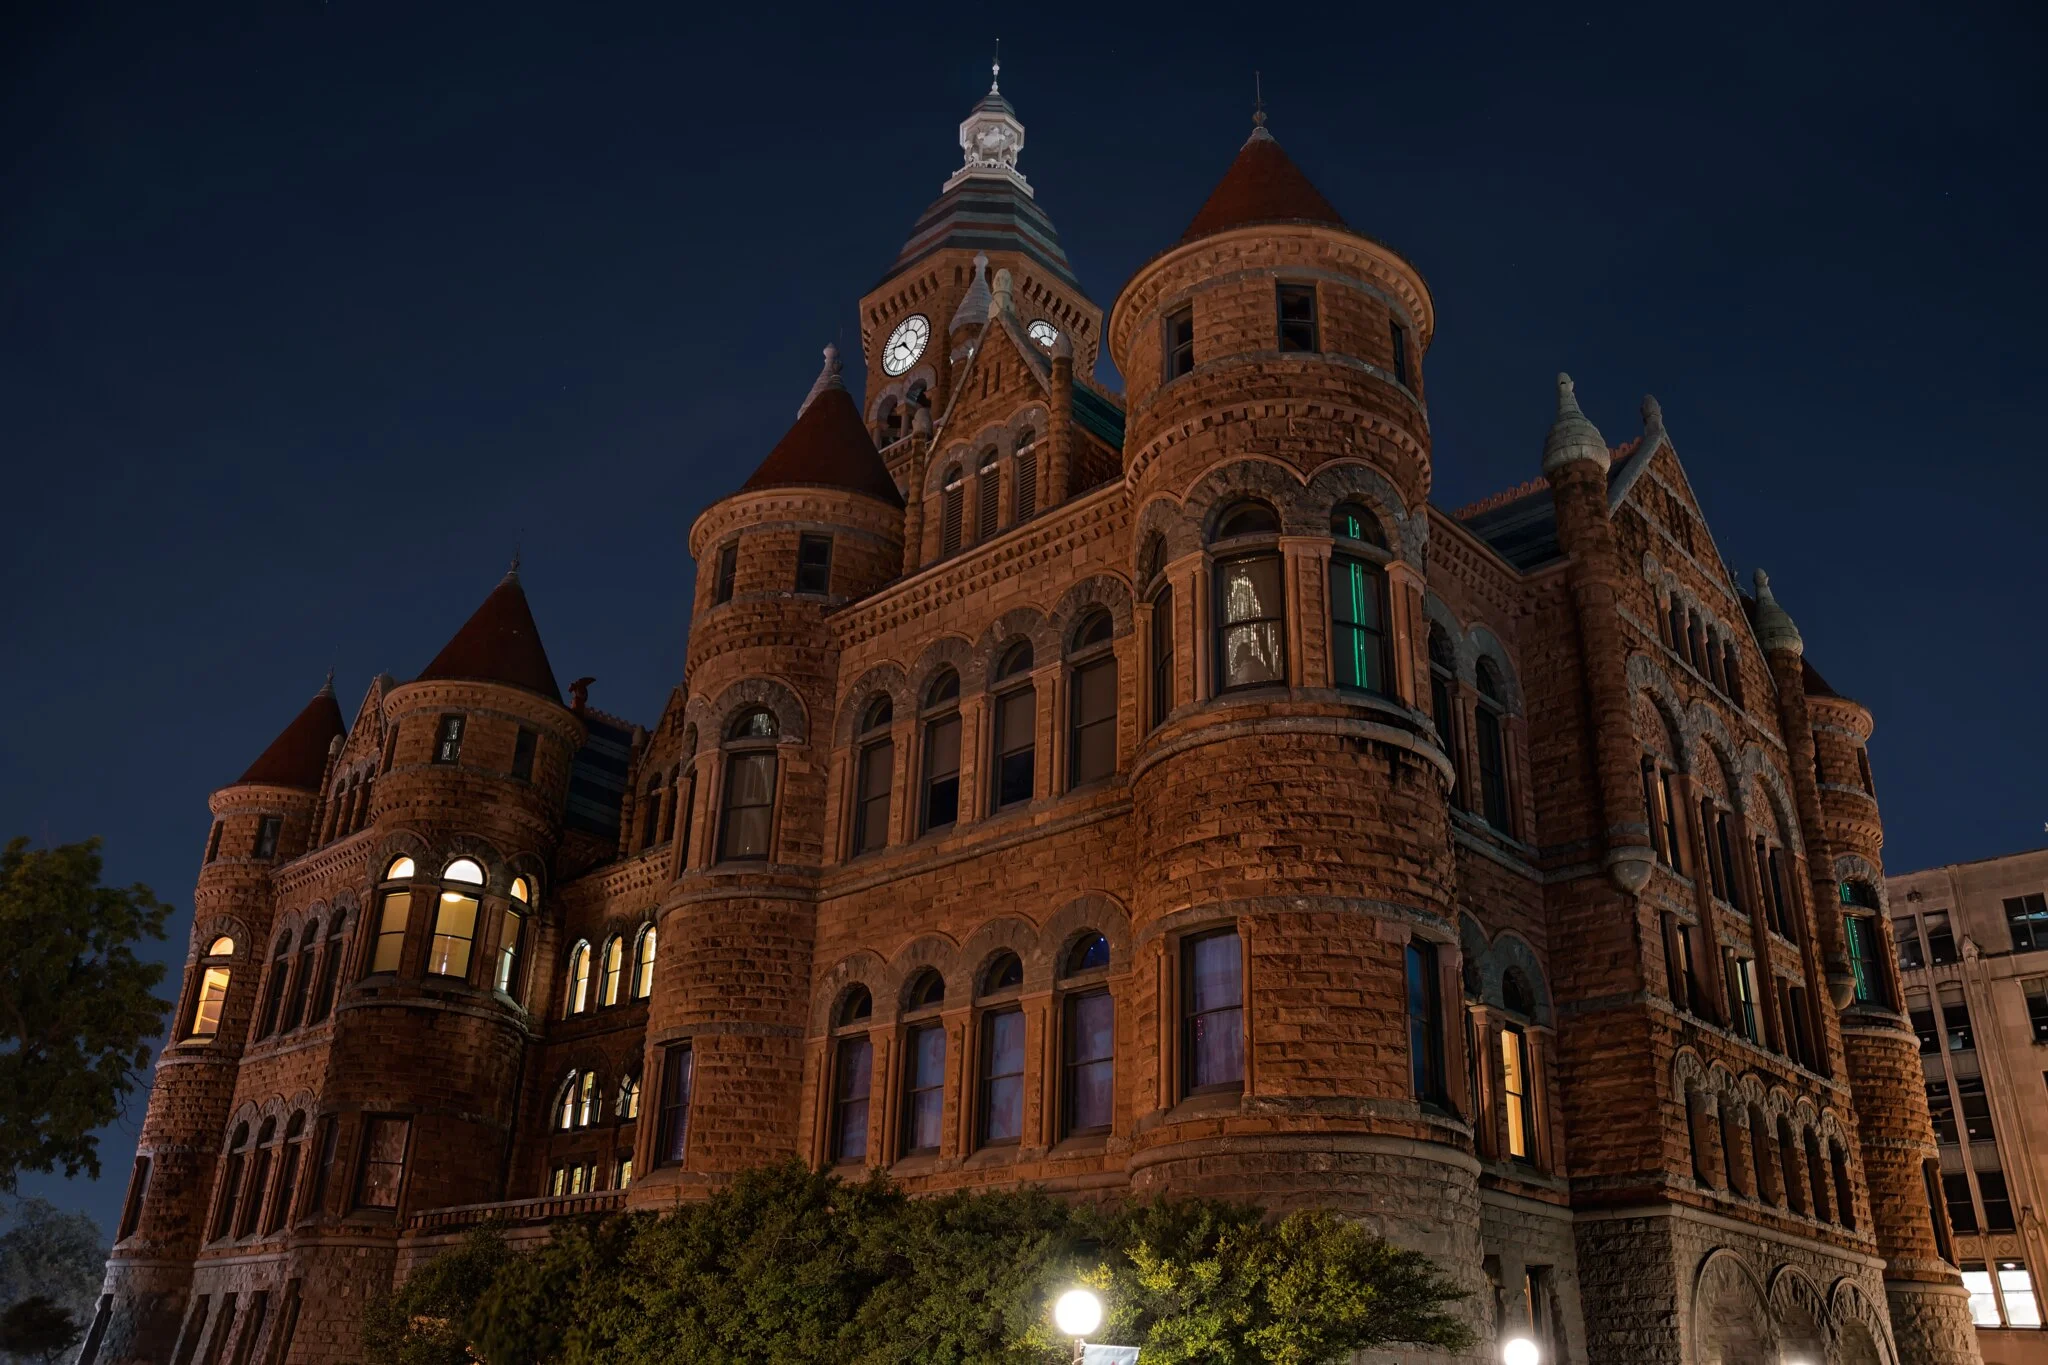
Known as the Old Red Museum, the Dallas County Courthouse is a striking example of Romanesque Revival architecture, featuring red sandstone walls, intricate turrets, and arched windows that make it a dream subject for architectural photographers. Originally built in 1892, this historic landmark stands out against the modern glass skyscrapers of downtown Dallas, creating a visually compelling contrast between old and new.
📷 Photo Tip
The courthouse is located in a bustling part of downtown, so shooting in the early morning (shortly after sunrise) offers the best chance to capture it without cars and pedestrians in the frame. Golden hour (sunrise and sunset) casts a warm, glowing light on the red sandstone, enhancing its rich color and architectural details. For a dramatic effect, try shooting during the blue hour (just after sunset) when the building's exterior lights contrast beautifully with the evening sky.
The best vantage points are from across the street, allowing you to frame the full structure without distortion. A wide-angle lens (16-35mm) is ideal for capturing the entire building, while a telephoto lens (70-200mm) lets you zoom in on intricate details like the carved stonework and clock tower. If photographing at night, use a tripod and a long exposure (5-10 seconds) to capture the illuminated facade against the dark sky. Consider including light trails from passing traffic for added dynamism.
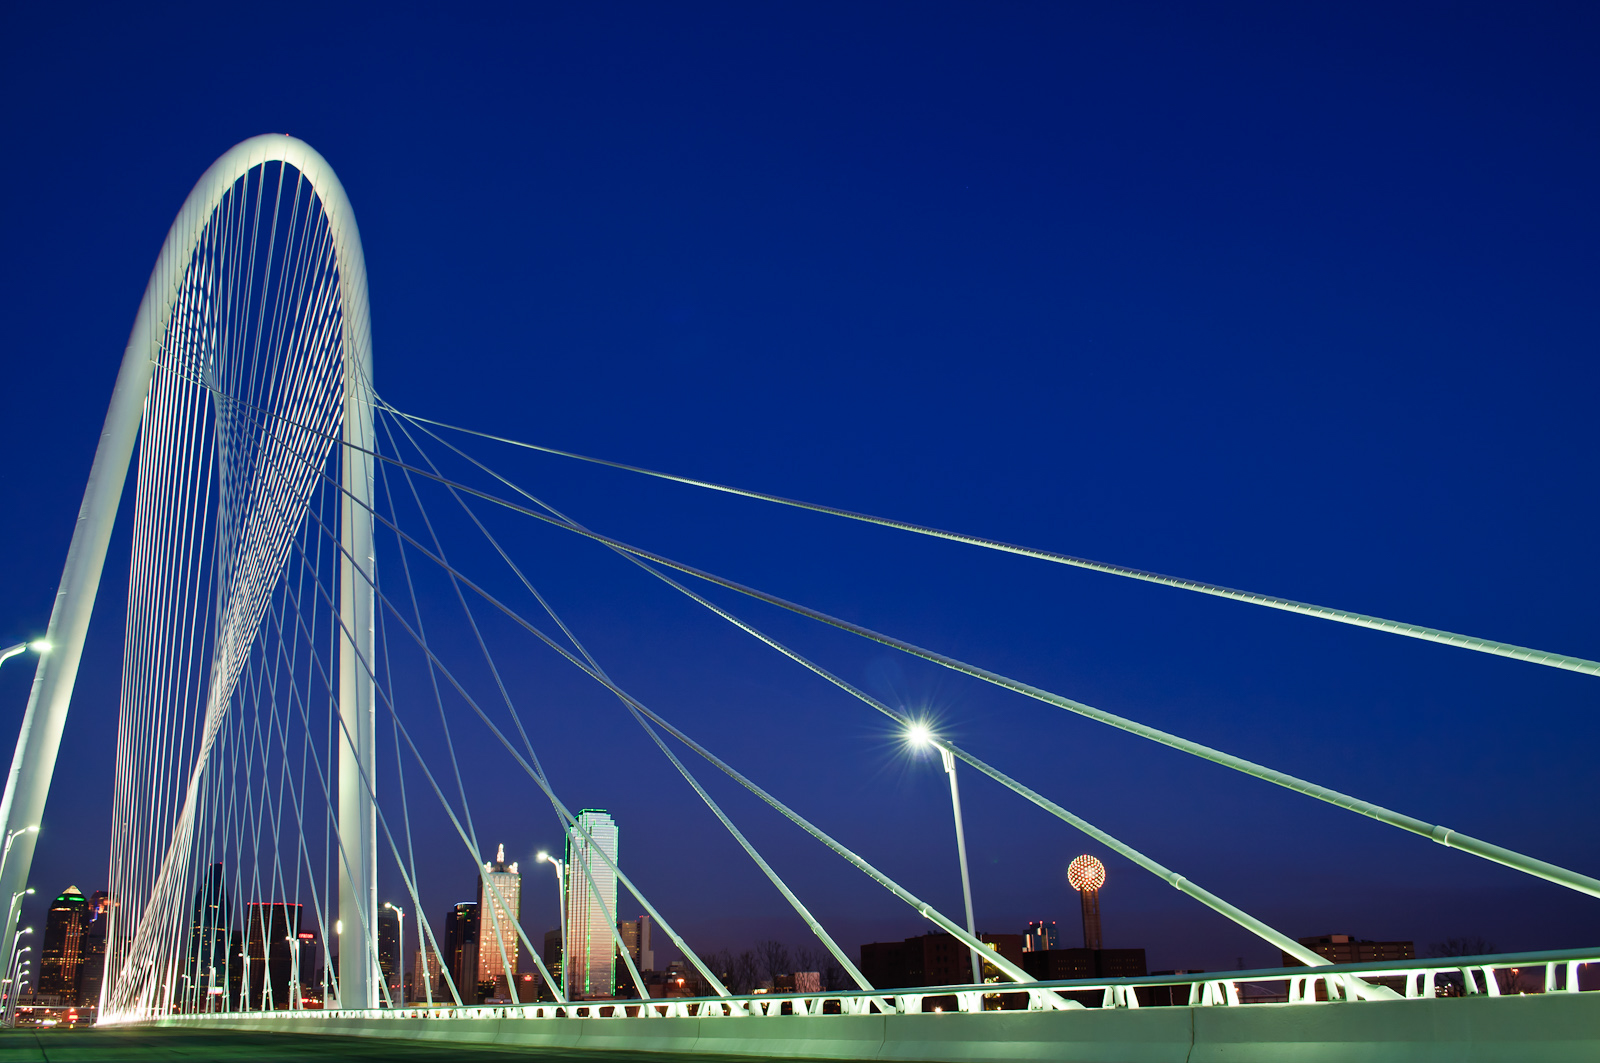
7. Margaret Hunt Hill Bridge
Margaret Hunt Hill Bridge - Photo by Marco Becerra
Designed by renowned Spanish architect Santiago Calatrava, the Margaret Hunt Hill Bridge is one of the most photogenic landmarks in Dallas. With its soaring white arch and sweeping cable design, the bridge serves as both an architectural masterpiece and a perfect frame for the Dallas skyline. Spanning the Trinity River, it connects downtown Dallas to West Dallas and provides incredible vantage points for cityscape photography.
📷 Photo Tip
For the best light, shoot at sunrise or sunset, when the golden glow enhances the bridge’s sleek curves against the soft sky. Blue hour and night photography create stunning long-exposure shots, with city lights and traffic forming dynamic light trails. For a moody, dramatic look, stormy or cloudy days provide striking contrast against the white structure.
Great vantage points include Trinity Overlook Park, which perfectly frames the bridge with the Dallas skyline, and the Ronald Kirk Bridge, offering a wide-angle pedestrian-friendly perspective. For a lower, dramatic angle, try the Trinity River Levee Trails, where reflections in the water add depth.
Use a wide-angle lens (16-35mm) for full-frame shots or a telephoto lens (70-200mm) for architectural details. At night, a tripod and long exposure (10-30 sec) will capture smooth light trails, while a polarizing filter helps reduce glare from city lights.
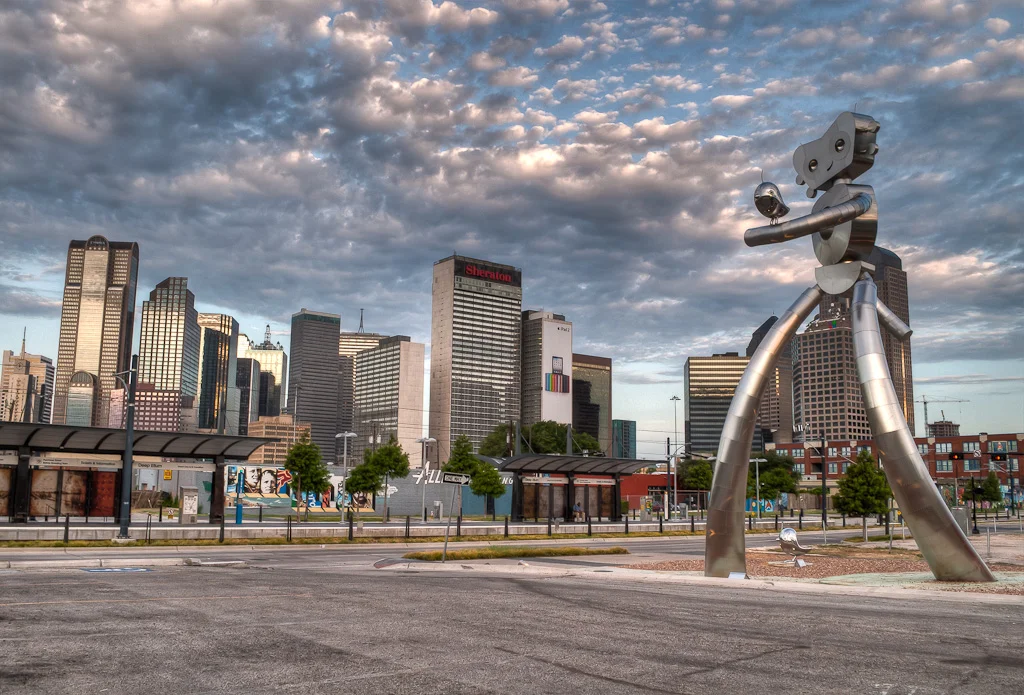
Deep Ellum is a vibrant arts district known for its colorful murals, neon signs, and historic brick buildings, making it a prime spot for street and urban photography. The best time to visit depends on your style—early mornings provide empty streets and soft light for capturing murals without obstructions, while afternoons offer the most natural light to enhance the colors of the artwork. For a more atmospheric and dynamic feel, shoot at night, when the neon lights from bars, restaurants, and concert venues illuminate the streets with a unique urban glow. Key locations include Elm Street and Main Street, where many of the most famous murals are located, and the Traveling Man sculptures, a series of towering metal figures that make for striking compositions.
📷 Photo Tip
A 50mm or 35mm prime lens is ideal for capturing street scenes while keeping a natural perspective. If you want to emphasize the scale of murals or shoot in tighter spaces, consider a wide-angle lens (16-35mm). When shooting at night, a fast lens (f/1.8 or wider) will help capture the ambient neon glow without excessive noise. To bring out the vibrant colors, shoot in RAW and adjust contrast and saturation in post-processing. Look for reflections in puddles or windows to create unique compositions.
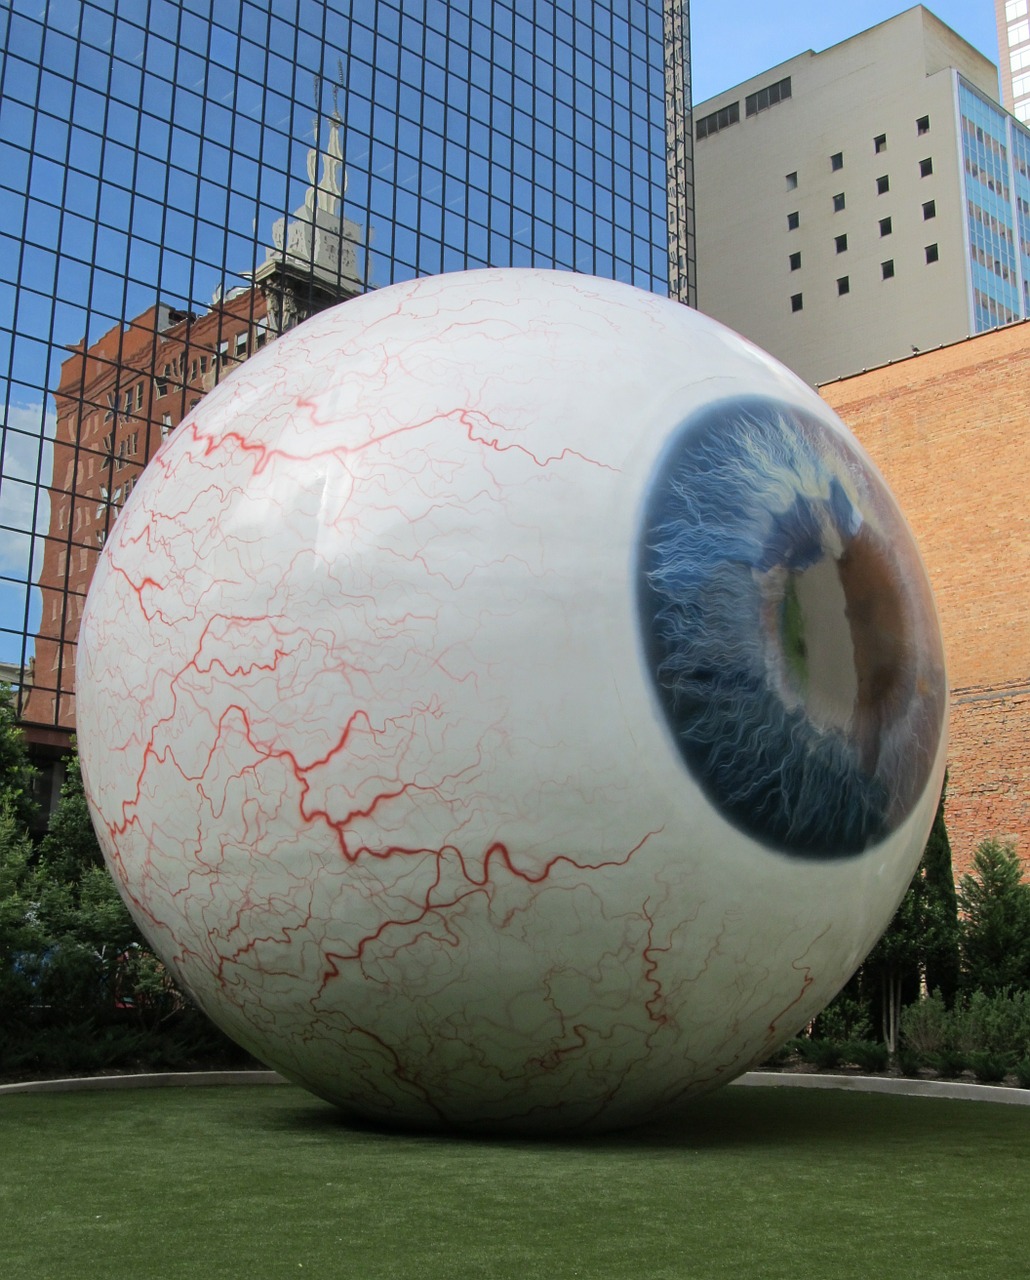
Standing 30 feet tall in downtown Dallas, the Giant Eyeball is a hyper-realistic sculpture by Tony Tasset, featuring intricate veins, a deep blue iris, and an eerie lifelike presence. Located at 1601 Main Street, this quirky installation contrasts sharply with the surrounding skyscrapers, making it a surreal and eye-catching subject. Though fenced off on private property, it remains highly photogenic, offering creative opportunities to capture its exaggerated scale, reflections in nearby glass buildings, or its striking juxtaposition against modern architecture. Whether framed for humor, abstraction, or dramatic contrast, the Giant Eyeball adds a uniquely bizarre element to the Dallas cityscape.
📷 Photo Tip
The best time to shoot is midday when sunlight evenly illuminates the sculpture, making its colors and details pop. However, early mornings and late afternoons offer softer shadows that add depth. If you want to capture an eerie or surreal vibe, consider shooting on an overcast day when the diffused light makes the eye appear even more lifelike. A wide-angle lens (16-35mm) works best to fit the entire sculpture into your frame while incorporating surrounding buildings for context. For a more compressed, abstract perspective, a telephoto lens (70-200mm) allows you to zoom in on details like the intricate veins and textures. If the fence becomes distracting in your composition, try a low-angle shot to emphasize the sculpture’s size while minimizing obstructions.
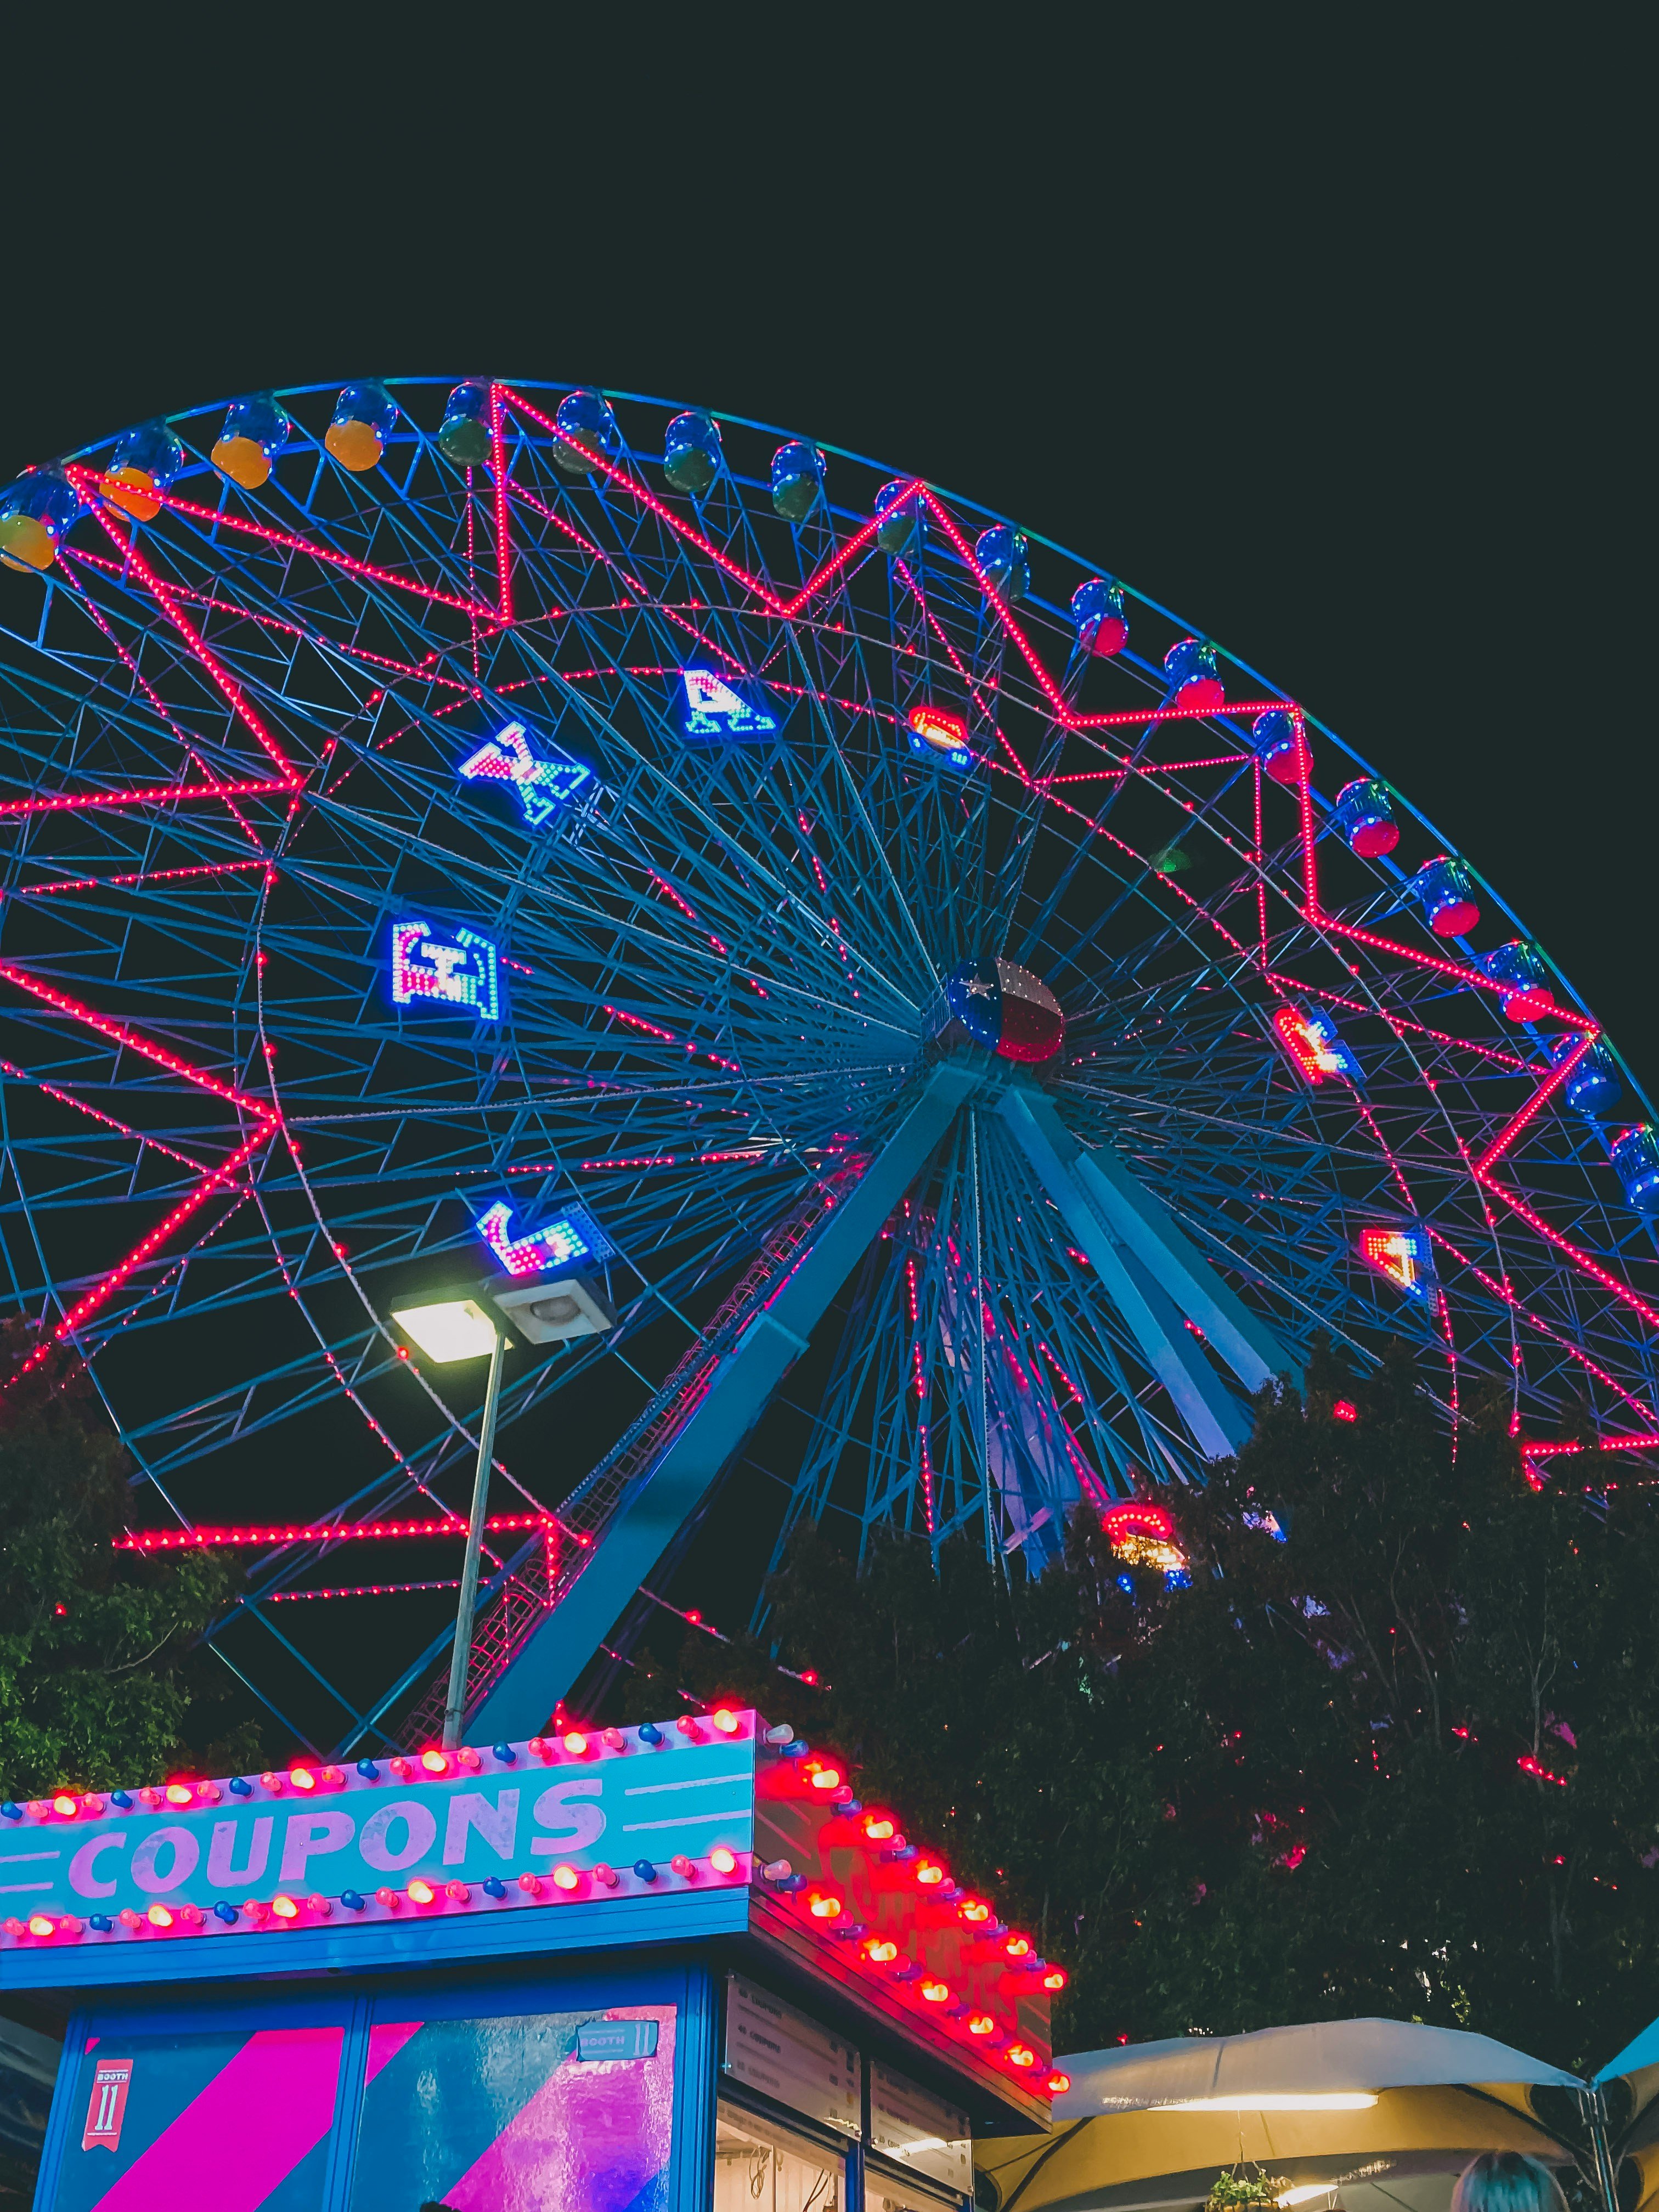
As one of the largest Ferris wheels in North America, the Texas Star is a must-photograph landmark at Fair Park in Dallas. Standing at 212 feet tall, this towering attraction dominates the skyline during the State Fair of Texas, where its bright, colorful lights create a mesmerizing focal point against the carnival atmosphere. The Texas Star has been an iconic part of the Dallas landscape since 1985, offering both stunning visual appeal and a nostalgic charm that makes it a favorite subject for photographers.
📷 Photo Tip
The Texas Star is most accessible during the State Fair of Texas (September-October) but can sometimes be photographed at other events held in Fair Park. The best angles can be found from a distance along the Esplanade, where the wheel is framed by reflections in the fountains, or up close for detailed shots of its structure and motion. For a classic full-frame shot, use a 24-70mm lens, while a wide-angle lens (16-35mm) helps incorporate the carnival atmosphere. If capturing light trails at night, set your camera to a slow shutter speed (5-10 seconds) and use a tripod to keep the image sharp. A neutral density (ND) filter can help achieve longer exposures, even at dusk. For a more dynamic composition, try positioning the Ferris wheel off-center and including foreground elements like fairgoers or food stands to add context and storytelling.
📍 Explore on PIXEO Map →
Conclusion
Dallas offers a diverse range of photo opportunities, from its sleek urban skyline to artistic districts and historic architecture. Whether you're capturing long exposures of the city lights or hunting for the perfect mural, these locations provide plenty of inspiration. Be sure to check local guidelines for photography restrictions and optimal visiting hours, and don’t forget to upload your best shots to the PIXEO Map!
Ready to explore? Grab your gear and start shooting!


Comments
Loading comments…